Things to do
- Checking to ensure that you and your web host have the minimum requirements to run WordPress.
- Download the latest release of WordPress from official WordPress website
- Unzip the downloaded file.
- Wordpress Installation You can download latest Wordpress version from wordpress.org. If you don't know what Wordpress is or have some difficulties with Wordpress installation, you can try to contact your service provider support.
Download and unzip the WordPress package if you haven't already. Create a database for WordPress on your web server, as well as a MySQL user who has all privileges for accessing and modifying it. Rename the wp-config-sample.php file to wp-config.php. Open wp-config.php in a text editor and fill in your database details as explained in Editing wp-config.php to generate and use your secret key password.
Upload the WordPress files in the desired location on your web server.
Run the WordPress installation script by accessing wp-admin/install.php in a web browser. If you installed WordPress in the root directory, you should visit: http://example.com/wp-admin/install.php If you installed WordPress in its own subdirectory called blog, for example, you should visit:http://example.com/blog/wp-admin/install.php
Follow the installation steps: http://codex.wordpress.org/Installing_WordPress
What's Included
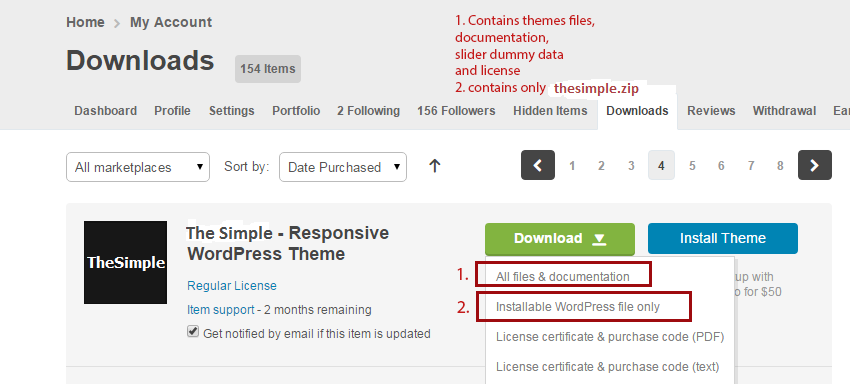
- The Simple Theme Folder- contains The Simple theme main folder, which you must zip (thesimple.zip) and upload into your wordpress installation.
- Documentation- the folder with all needed documentation files, for you to quickly became familiar with the theme.
- Slider dummy data- contains the dummy data for Revolution Slider.
- Licensing Folder- contains the licensing files, this is not the purchase code that you need to download from Themeforest.
Support Forum
- Step 1 - Click Here To Create An Account , you will need your Theme Forest purchase code which can only be received after buying the theme from Themeforest.net.
- Step 2- You need to enter your Themeforest Purchase code, e-mail and password. Your forum username will be the same username that purchased the theme on Themeforest.
- Step 3- Once you signed up, you need to sign into the forum with your new account to start using the forum. Please use search field to previously check for answers, before deciding to write yours.
- Step 4- To create new topic, select the forum on the sidebar " go to the end of the page" and create a new topic.
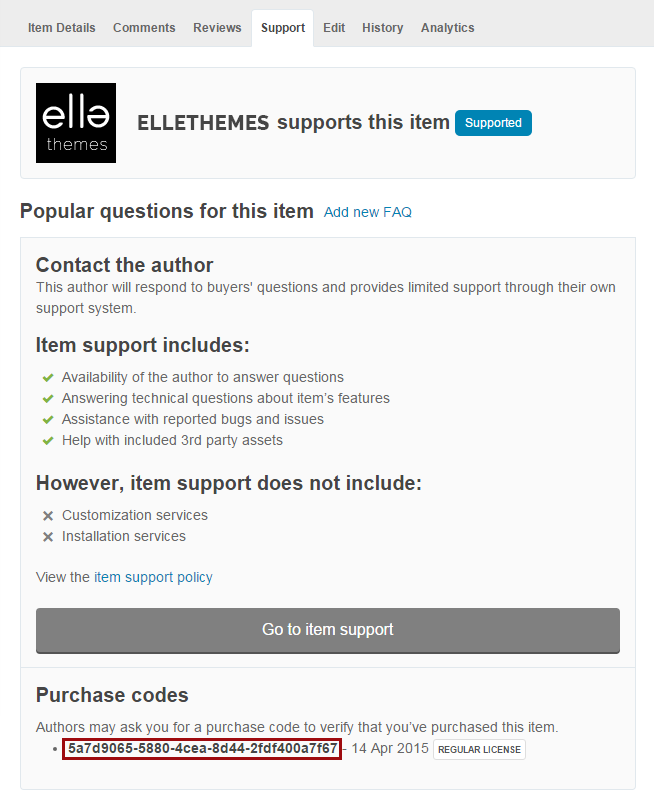
Here is a screen shoot to show you how to find the purchase code.
Before You Post On Forum
- Step 1- Always check the Documentation. Most of your answers will be found there.
- Step 2- Always perform a Forum Search before deciding to start a new topic. Most common issues are already brought up and answered.
- Step 3- If you can't still find an answer to your problem, please post a new topic. Be sure to be as descriptive as possible. If you want you can send in a private reply your wp or ftp credentials. In most cases this saves a lot of time for both parties.
- Step 4- Last, patiently wait! We will try to respond ASAP. Please keep in mind that we answer threads from old to new. So, rewriting the same question will only increase the responding time!
2. Installation
Install Wordpress
For installing wordpress either locally or in a web host, please see more detailed information here!
Theme Installation
Using the Setup Wizard
The automatic setup wizard will help you configure your new website. This wizard will install the required WordPress plugins, default content, logo and tell you a little about Help & Support options. It will start right after you have activated theme in Appearance > Themes. If you do not want to keep the set up going, then just click the "Skip" option. If you continue with the set up, these are the steps on the way:
- Start – a quick automatized guide to set up dummy data.
- Plugins – a list of all available plugins included in theme package. If you click on Continue, the plugins will automatically get installed one at a time. To uninstall or change any of them in the future just go to your Wordpress dashboard > Plugins menu.
- Content – select one of the available demos. Choose what you want to import from the check list below and click Continue.
- Logo & Design – add a logo for your site. It is best to keep it in the default dimensions. If you want to keep the default logo just move on to the next step with Continue.
- Customize – a short description on what is included in theme customization and where to go to do it.
- Support – a short insight on our support policy, terms and conditions.
- Ready! – Lastly, you are ready to continue customizing the site with your own content.


All done!
Using Wordpress admin panel:
Step 1- Navigate to Appearance > Themes.
Step 2- Click Install Themesand than Upload.
Step 3- Navigate to the "thesimple.zip" folder in your computer, and click Install Now. If you have downloasded all the themes files, and can't find the zip file, unzip the downloaded file from themeforest, find the folder 'thesimple' and zip it. This is the file you should upload.
Step 4- Now you need to activate the uploaded theme. To do so, go to Appearance > Themes and Activate.
Step 5- You will then see a notification message to activate the required and recommended plugins: LayerSlider WP, MailChimp List Subscribe Form, Revolution Slider, User Avatar, WPBakery VIsual Composer and WP Retina 2x. Follow the steps to install and activate each plugin.
Common Install Error: Are You Sure You Want To Do This? If you get the "Are You Sure You Want To Do This" message when installing thesimple.zip file via WordPress, it means you have an upload file size limit. Install the theme via FTP if this happens, or call your hosting company and ask them to increase the limit.
FTP Installation
Follow the steps below to install via FTP.
Step 1– Log into your hosting space via an FTP softwareStep 2– Unzip the thesimple.zip file and ONLY use the extracted thesimple theme folder
Step 3– Upload the extracted The Simpletheme folder into wp-content > themes folder
Step 4– Activate the newly installed theme. Go to Appearance > Themes and activate it.
Step 5– Then you will see a notification message to activate the required & recommended plugins: MailChimp List Subscribe Form, Revolution Slider, User Avatar, WPBakery Visual Composer and WP Retina 2x. Follow the steps to install and activate each plugin.
Plugin Installation
The Simple has several plugins that you need to install in order for the theme to be fully equipped. There are two ways of installing plugins. Depending on the type of way you import your dummy data. If you use the authomatic data import, that starts just when you first activate theme, then you may install all included plugins in the first phase of this process. If you skip this process, then you will have several notices during installation and after, which will instruct you, which plugin to install.
Included plugins with the installation folder
- WPBakery VIsual Composer- is a premium, drag and drop front-end and back-end page builder plugin that will save you tons of time while working on your site content.
- Elle Custom Post Type- Create required custom post types, portfolio, staff, testimonial etc.
- Elle Shortcodes- Register Shortcodes required by the theme.
- Envato Wordpress Toolkit- WordPress toolkit for Envato Marketplace hosted items. Currently supports the following theme functionality: install, upgrade, & backups during upgrade.
- Soundcloud Shortcode- Converts SoundCloud WordPress shortcodes to a SoundCloud widget.
- LayerSlider WP- is the most advanced responsive WordPress slider plugin with the famous Parallax Effect and over 200 2D & 3D transitions.
- Revolution Slider- this is a premium slider plugin created by ThemePunch.
- MailChimp List Subscribe Form- allows you to quickly and easily add a signup form for your MailChimp list.
- User Avatar- Allows users to associate photos with their accounts by accessing their "Your Profile" page that default as Gravatar or WordPress Default image (from Discussion Page).
- WP Retina 2x- Make your website look beautiful and crisp on modern displays by creating + displaying retina images. WP 4.4 is also supported and enhanced.
Additioal plugins
- Contact Form 7- this is a free plugin. It is used for forms on various pages. It is fully integrated with The Simple theme.
Update theme
There are three ways to update your theme. Before you update, it is best practice to always check our update notes. Also we strongly recommend you to make a backup of your previous theme folder. See the information below for more.
Method 1
Updating theme using Envato Toolkit plugin
-
Step 1 – Go to Envato Toolkit

- Step 2 – Enter your Envato Username and Secret API key. Follow the instructions to find the key.
- Step 3 – Click 'Save Settings'.
- Step 4– There will appear a new tab 'Themes'. Find The Simple theme there and click update. Then wait some seconds.
- Step 5– Last, update the included plugins. You will see a notification message letting you know the plugins have a new version and need to be updated. Follow the on screen steps.
Method 2
Updating theme via Wordpress
- Step 1 – Deactivate the current "The Simple" theme in the "Appearance > Themes" section by simply activating a different theme. Once you activate a different theme, you can delete the The Simple theme. Your data is saved in the database so the content will not be lost!
- Step 2 – Retrieve the "thesimple.zip" file from your new Themeforest download. If you downloaded the "Main Files" from Themeforest, then just unzip the archive file you received. Retrieve the "thesimple" inside of it. Zip it, and upload via Wordpress dashboard.
- Step 3 – In the "Appearance > Themes" section, click on the "Install Themes" tab at the top and choose to upload the "thesimple.zip" file.
- Step 4– After the upload is done, activate the theme.
- Step 5– Last, update the included plugins. You will see a notification message letting you know the plugins have a new version and need to be updated. Follow the on screen steps.
Method 3
First you need to manually download the new theme package from your Themeforest account. Once you have the new theme package, you can choose to upload the theme via WordPress or via FTP. Please see the information below for how to download new files, and install options.
How to download new theme file's from ThemeForest
- Step 1– Log-in to your Themeforest account and navigate to your Downloads tab. Find the "The Simple" theme purchase.
- Step 2– Download the "Installable WordPress Theme" which is just the WordPress theme, or choose the "Main Files". This is the full package, containing the theme folder, documentation folder, licence and purchase code.
- Step 3– You can install the update via FTP or via WordPress. Please find directions for both methods below.
Updating theme via FTP
- Step 1 – Go to "wp-content > themes" location and backup your "The Simple" theme folder by saving it to your computer, or you can choose to simply delete it. Your content will not be lost.
- Step 2 – Retrieve the newly downloaded "thesimple.zip" file from your hard-drive and extract the file to get the "The Simple" theme folder.
- Step 3 – Drag and drop the new "The Simple" theme folder into "wp-content > themes" location. Choose to "Replace" the current one if you did not delete it.
- Step 4 – Lastly, update the included plugins. You will see in your wordpress dashboard, a notification message letting you know the plugins have a new version and need to be updated. Follow the on screen steps.
Import demo content

Method 2 - Manual
Find this option at The Simple > Import/Export menu in the Dashboard. Select the demo you want to import by clicking on it. Then scroll down to the Import button. Click it to start importing the dummy data of the selected demo. Please know that the import does not include the images. If you want to included images too, then check the Check to import attachments option checkbox in the Import Options.
Dummy data include pages, posts, portfolio items and other post types such as testimonials .etc. To import partial content, select one of the opetion from the drop-down list. You can choose to import All; only Content, Theme Options; Widgets or Import from the Online Builder
3. Theme Options
The Simple has an advanced and complete Theme Options panel. It's organized in tabbed sections, where each option has a clear description on it's function.
In this documentation you will find an explanation to all the available options.
Find The Simple theme options at your Wordpress admin panel -> The Simple, in the main WP left menu. Note: We will be add more options with future theme updates.
General Options
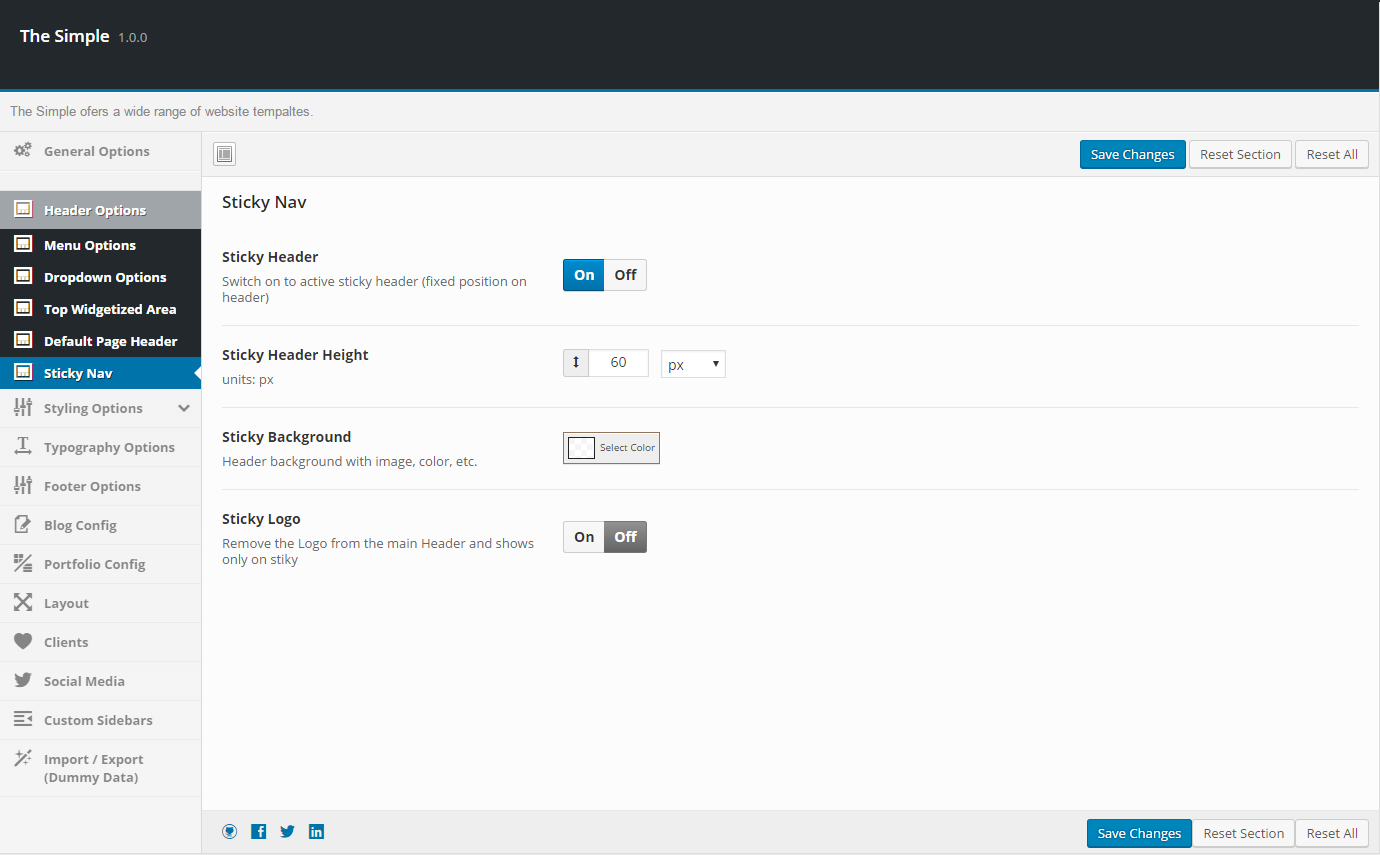
In this section you can customize basic options like the logo, responsive layout, activate sticky header, select the special pages , add custom CSS & Javascript code.. etc.

General Options video tutorial
Header Options
The section where to configure your header, Main menu, Top navigation options, Page Headers options and Dropdown options.

Styling Options
Change partially or completely the theme's style. In this section you will find all styling configurations for primary color, fonts color.. etc for every element available in the theme.


Typography Options
Here you can set the body and headings font typography and font sizes.

Blog Configuration
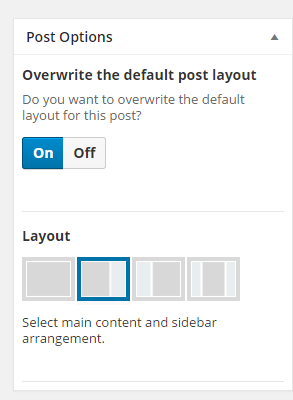
Styling of the blog: blog style, layout, single post layout and active post like.

The Simple has many blog styles, you can select the blog style that fits your website. Here is a list of different blog styles.
Portfolio Configuration
Here you can set the portfolio slug and portfolio custom fields parameters.

Layout
Here you can set the overall site layout,like page container width in both percentage or pixels. The extra side navigation and it's position. The page builder row margin bottom and inner page content padding.

Testimonials , Staff and FAQs
Testimonials , Staff and FAQs are some of the basic Wordpress custom type posts, for you to make the site more dynamic. Go to your Wordpress Dashboard and add/edit/remove testimonials, staff personel and fAQs to your wish.
Testimonials, Staff & FAQs Video Tutorial
Clients
Here you can add/edit clients for both the light and the dark background versions.

Import / Export dummy data
Choose Demo Content
In just a few clicks you will have already the site you see when first visiting our theme in ThemeForest. Even more convenient is the fact that you can choose how many of that data you will import. You can import All, just the Content, Theme Options configurations or the Widget configurations. All the demo content data and setting will be do downloaded to your WP installation.
Here
you can view all demo sites created with The Simple.

Export settings
At Export settings choose 'all' and click 'Export'. A backup of the site will be saved at /The Simple/includes/dummy_data/ backup and it will appear here (if you refresh the page):

Just select the backup and click Import if you want to restore that backup. Import Demo Data Video Tutorial
4. Header
Setup Header
The Simple theme offers a powerful & advances option panel organized into sections which allows the user to customize the theme in every aspect. The Header section offers the user the possibility to choose the header style from a list of predefined headers, also customize them by choosing from the options.

Here are the different header style. Click on different header styles to see how do they look on our theme demos.
1. Default - Transparent header without container

2. Business - Simple white header with top navigation

3. Business - Simple header with colored top navigation

4. Business - Simple header with menu under logo and header widgets

5. Business - Simple header with buttons in menu

6. Creative - Transparent header with border

7. Centered logo - Logo in center with 2 side menus

8. Modern style - Boxed header

9. Minimal - With fullscreen menu

10. Centered logo and menu - With menu under logo

Vertical Headers
Header Options
Header Options in The Simple theme options panel offers the possibility to customize the main header by selecting the header style (select from 11 header styles), define header height, background, show/hide search in header. Also it has some extra options:
- Show Search - Check this if you want the search field in the right part of the header
- Remove container from header - By checking this the header container should be removed and transformed in full-width header (can't use with left menu)
- Add button to header - Add a button in header after the menu
- Header Borders - Add Borders in header

Dropdown Options
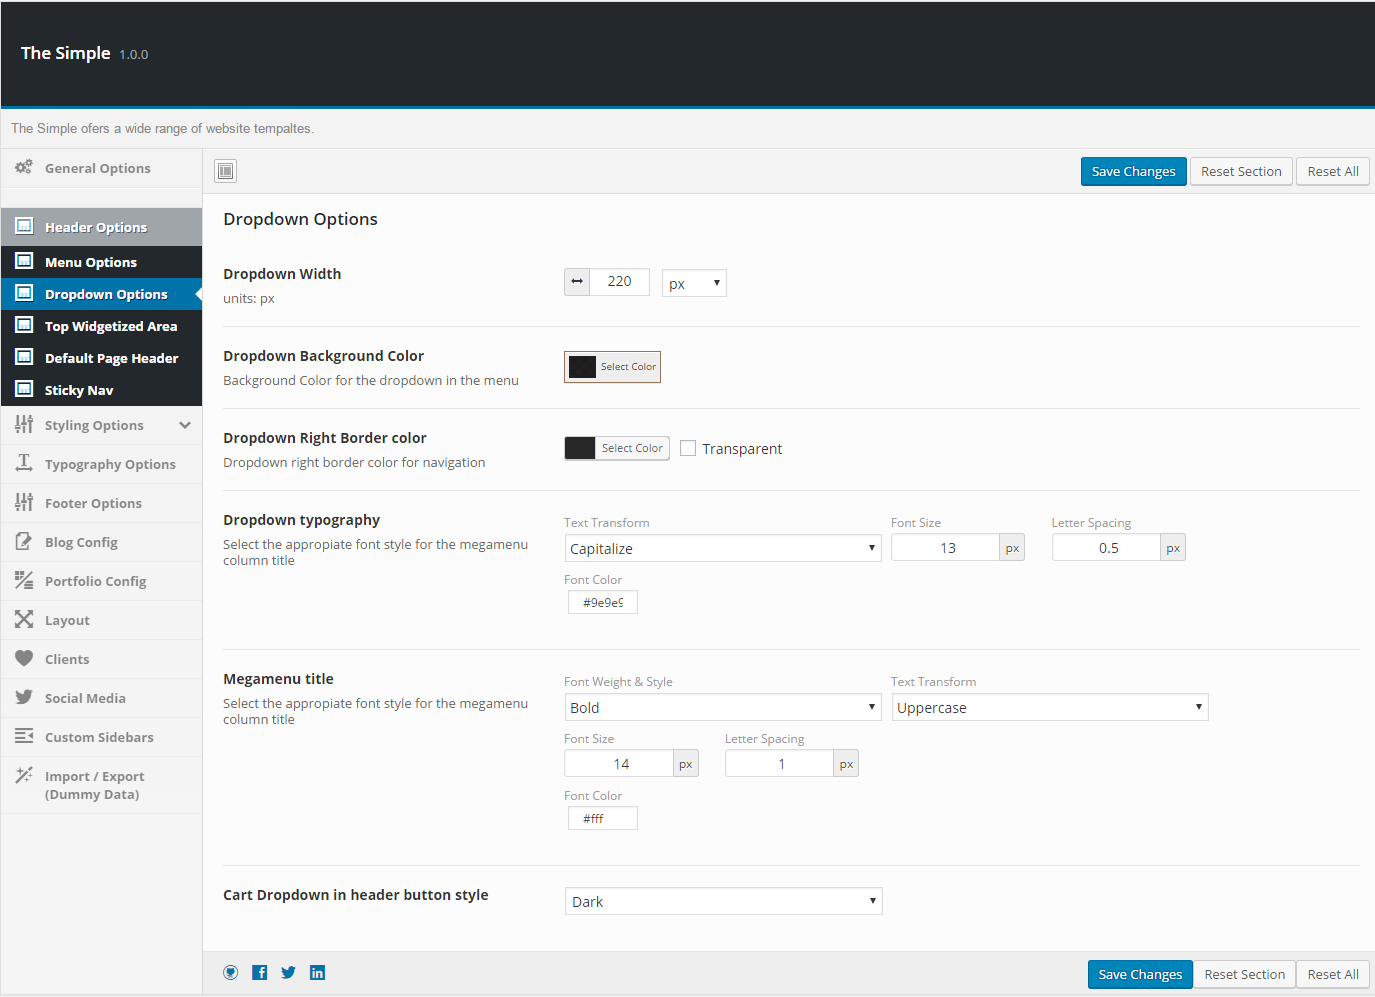
In this section the user can set up the dropdown menu, set background colour, borders, typography and Mega-menu.
Default Page Header
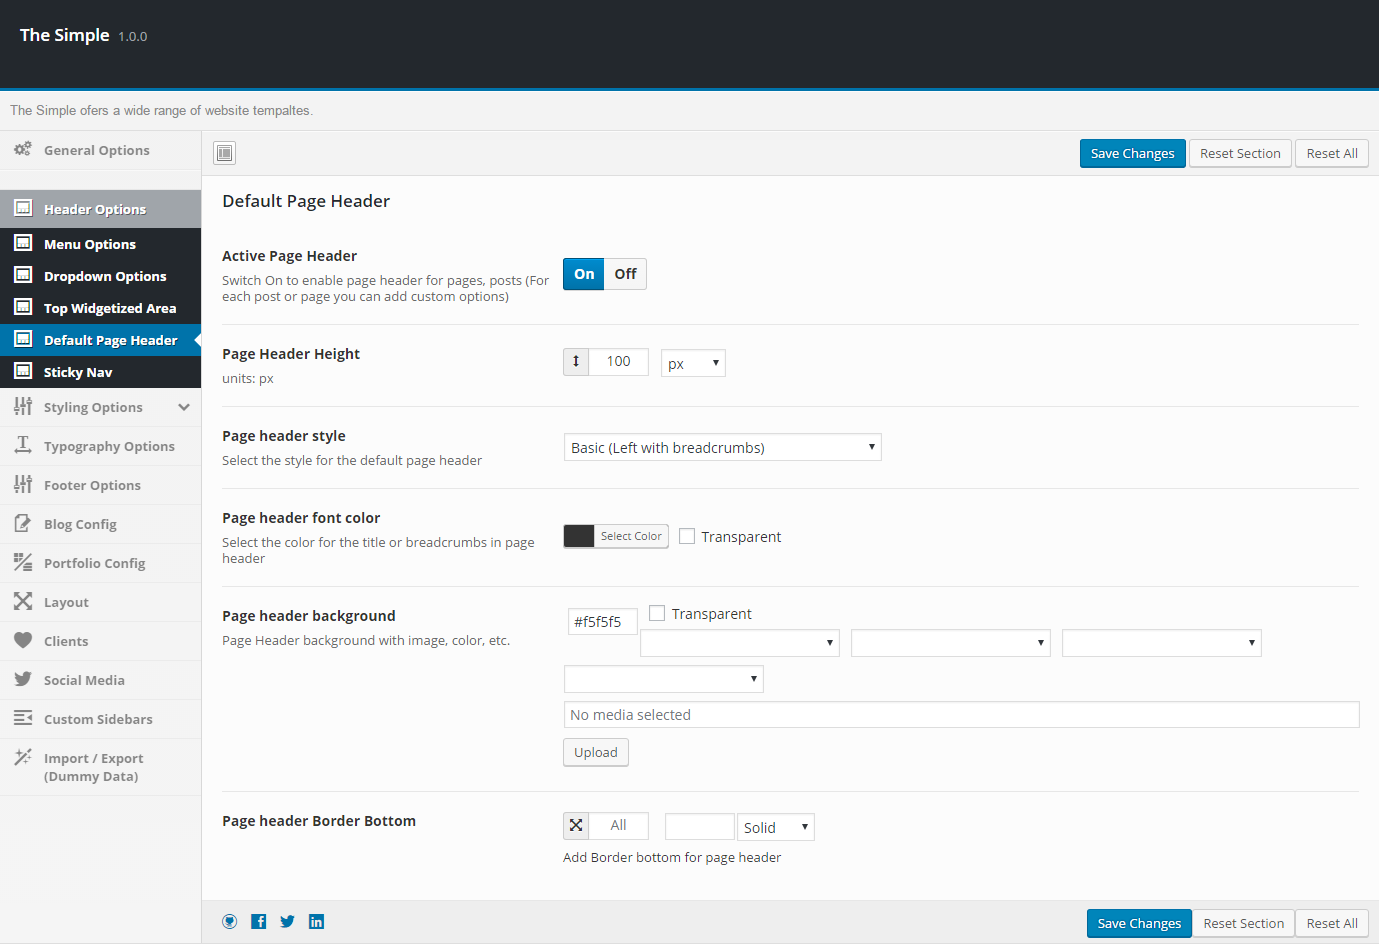
Switch On to enable page header for pages, posts (For each post or page you can add custom options). Select the style, background, font colour, height.. etc, for your page header.
5. Page templates
How to create Blog Page
The first blog method we will cover is the standard WordPress method, setting up an assigned blog or "post" page. It’s as simple as making a new page, and then telling WordPress to use that page as the post page.
Follow These Steps Below To Assign A Blog Page
- Step 1– Navigate to Pages and click Add New.
- Step 2– Input a new name for your page, then find the Page Attributes box on right side.
- Step 3– Select the Default page template from the dropdown list.
- Step 4– Select any number of page options in the Page Options Box.
- Step 5– Click Publish to save the page.
- Step 6– To set the page as your post page, navigate to The Simple > General Options and select your blog page name for the Posts Page. Doing this will automatically pull your blog posts and place them on the page.
Blog Styles
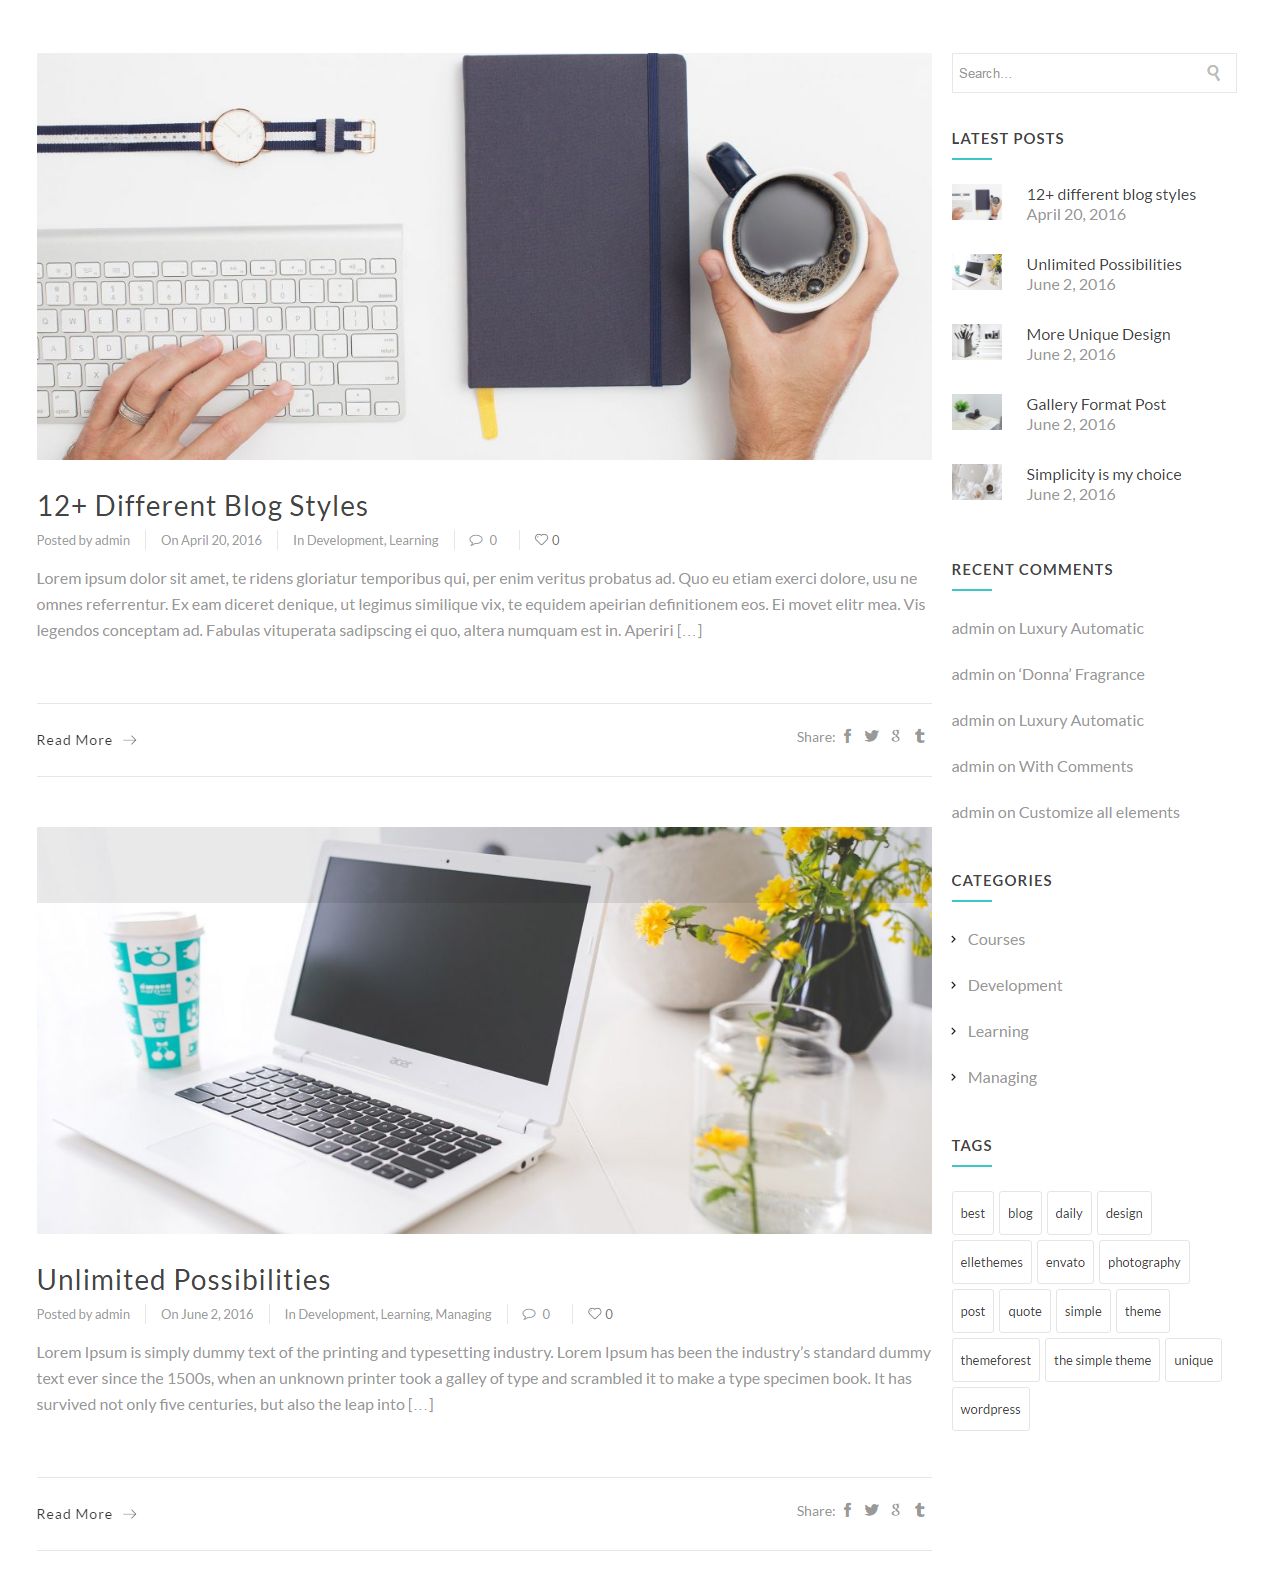
Simple Blog

Here is how it looks:
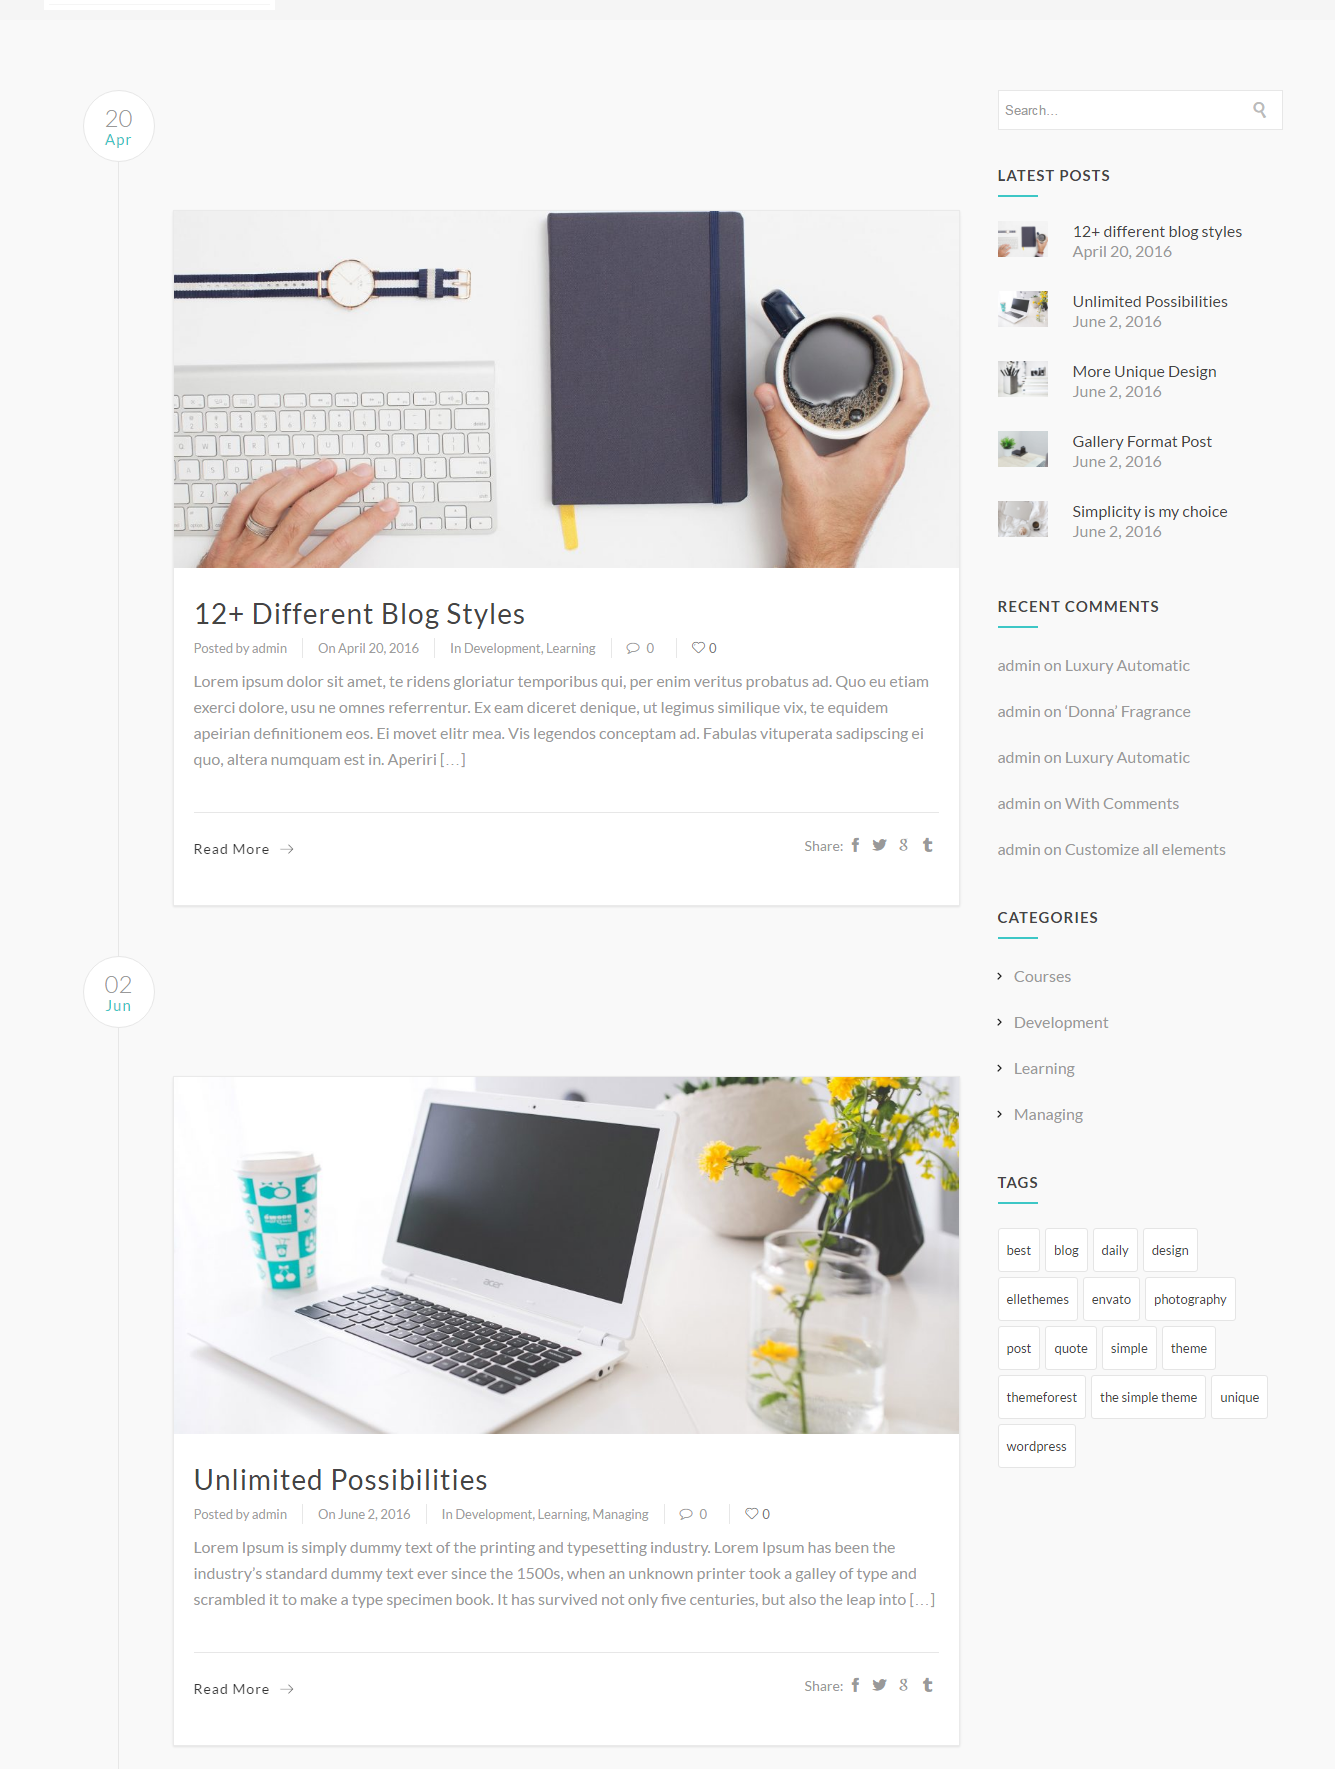
Timeline Blog
Here is how it looks:
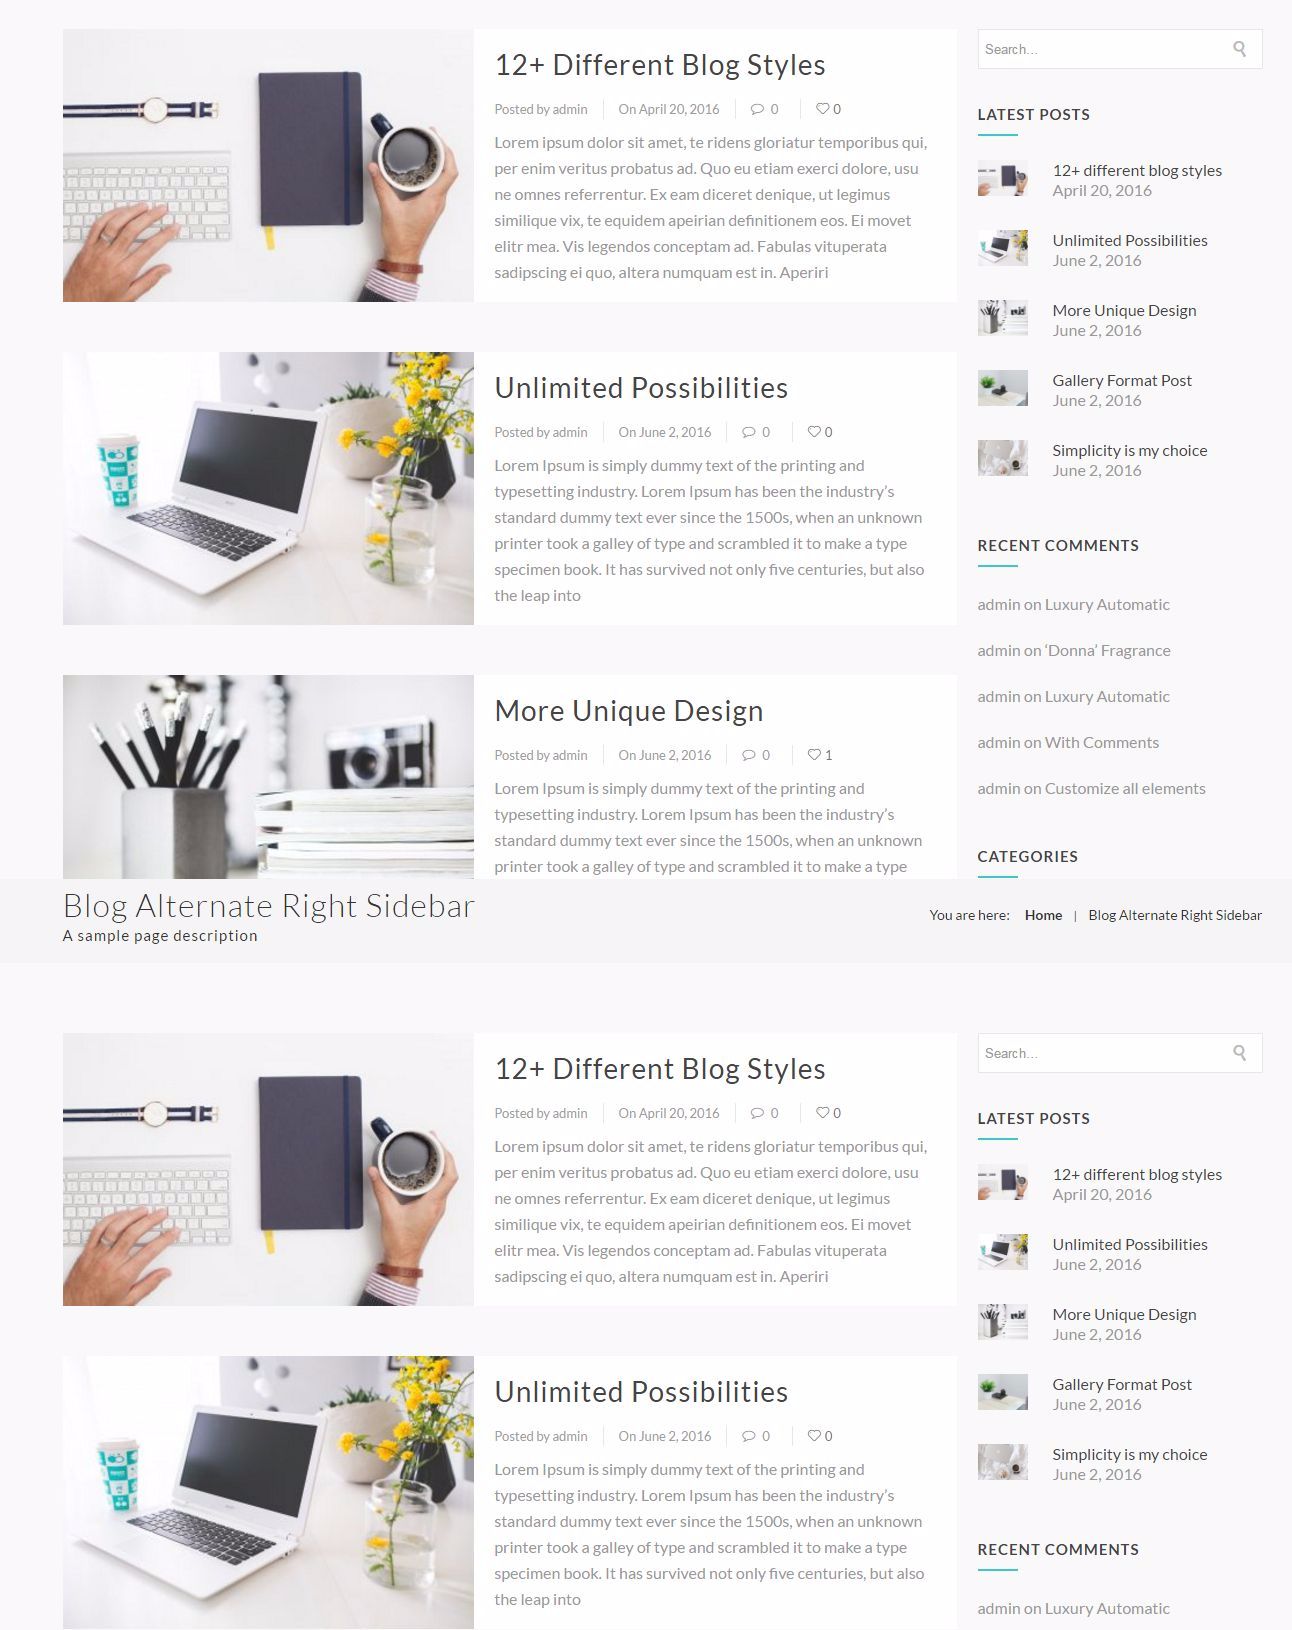
Altenate Blog
Here is how it looks:
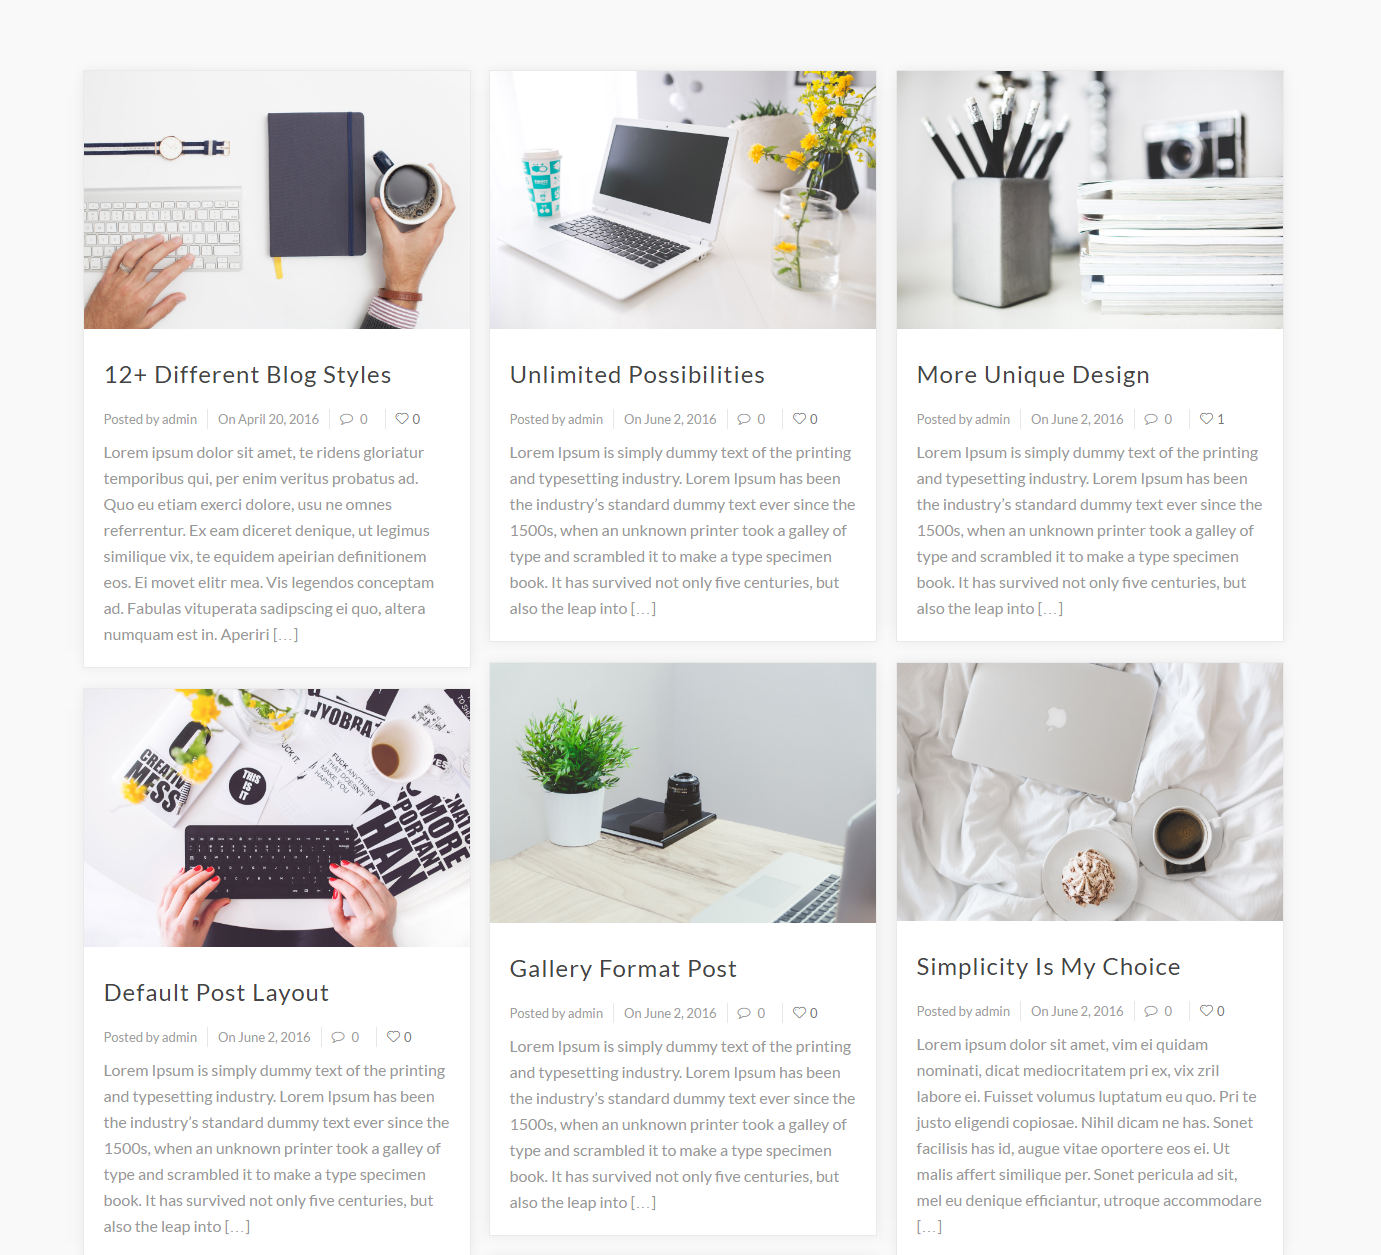
Masory Blog
Here is how it looks:
Fullscreen Innovative Blog
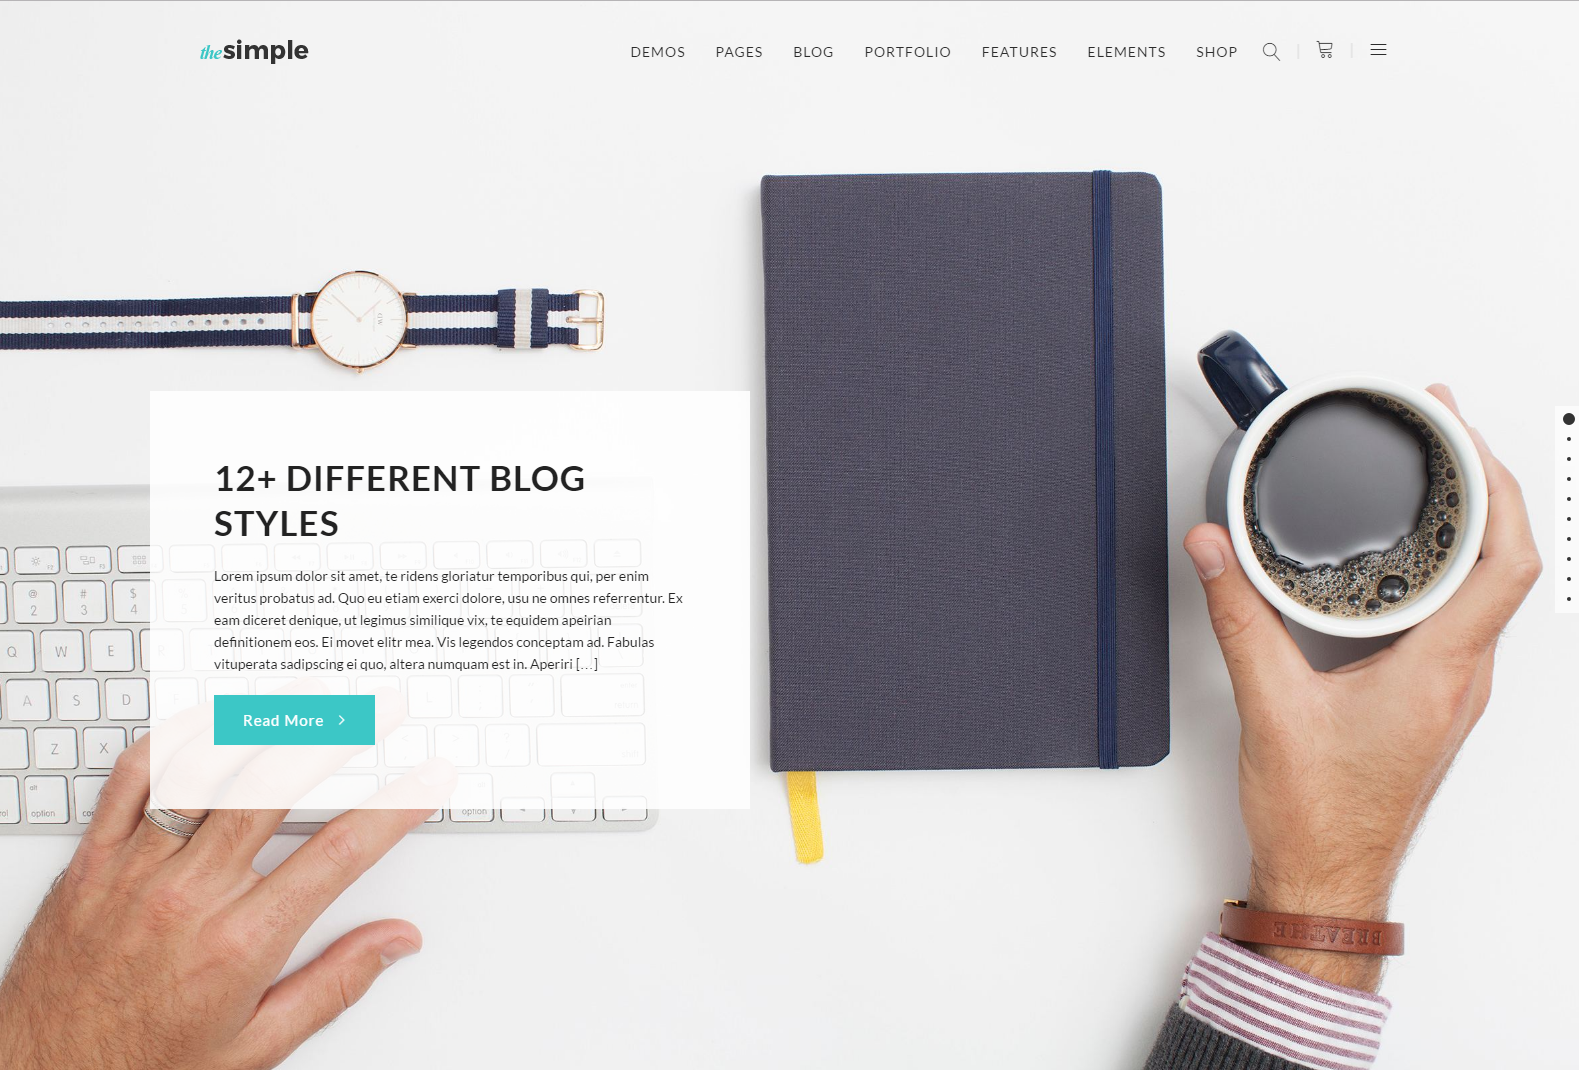
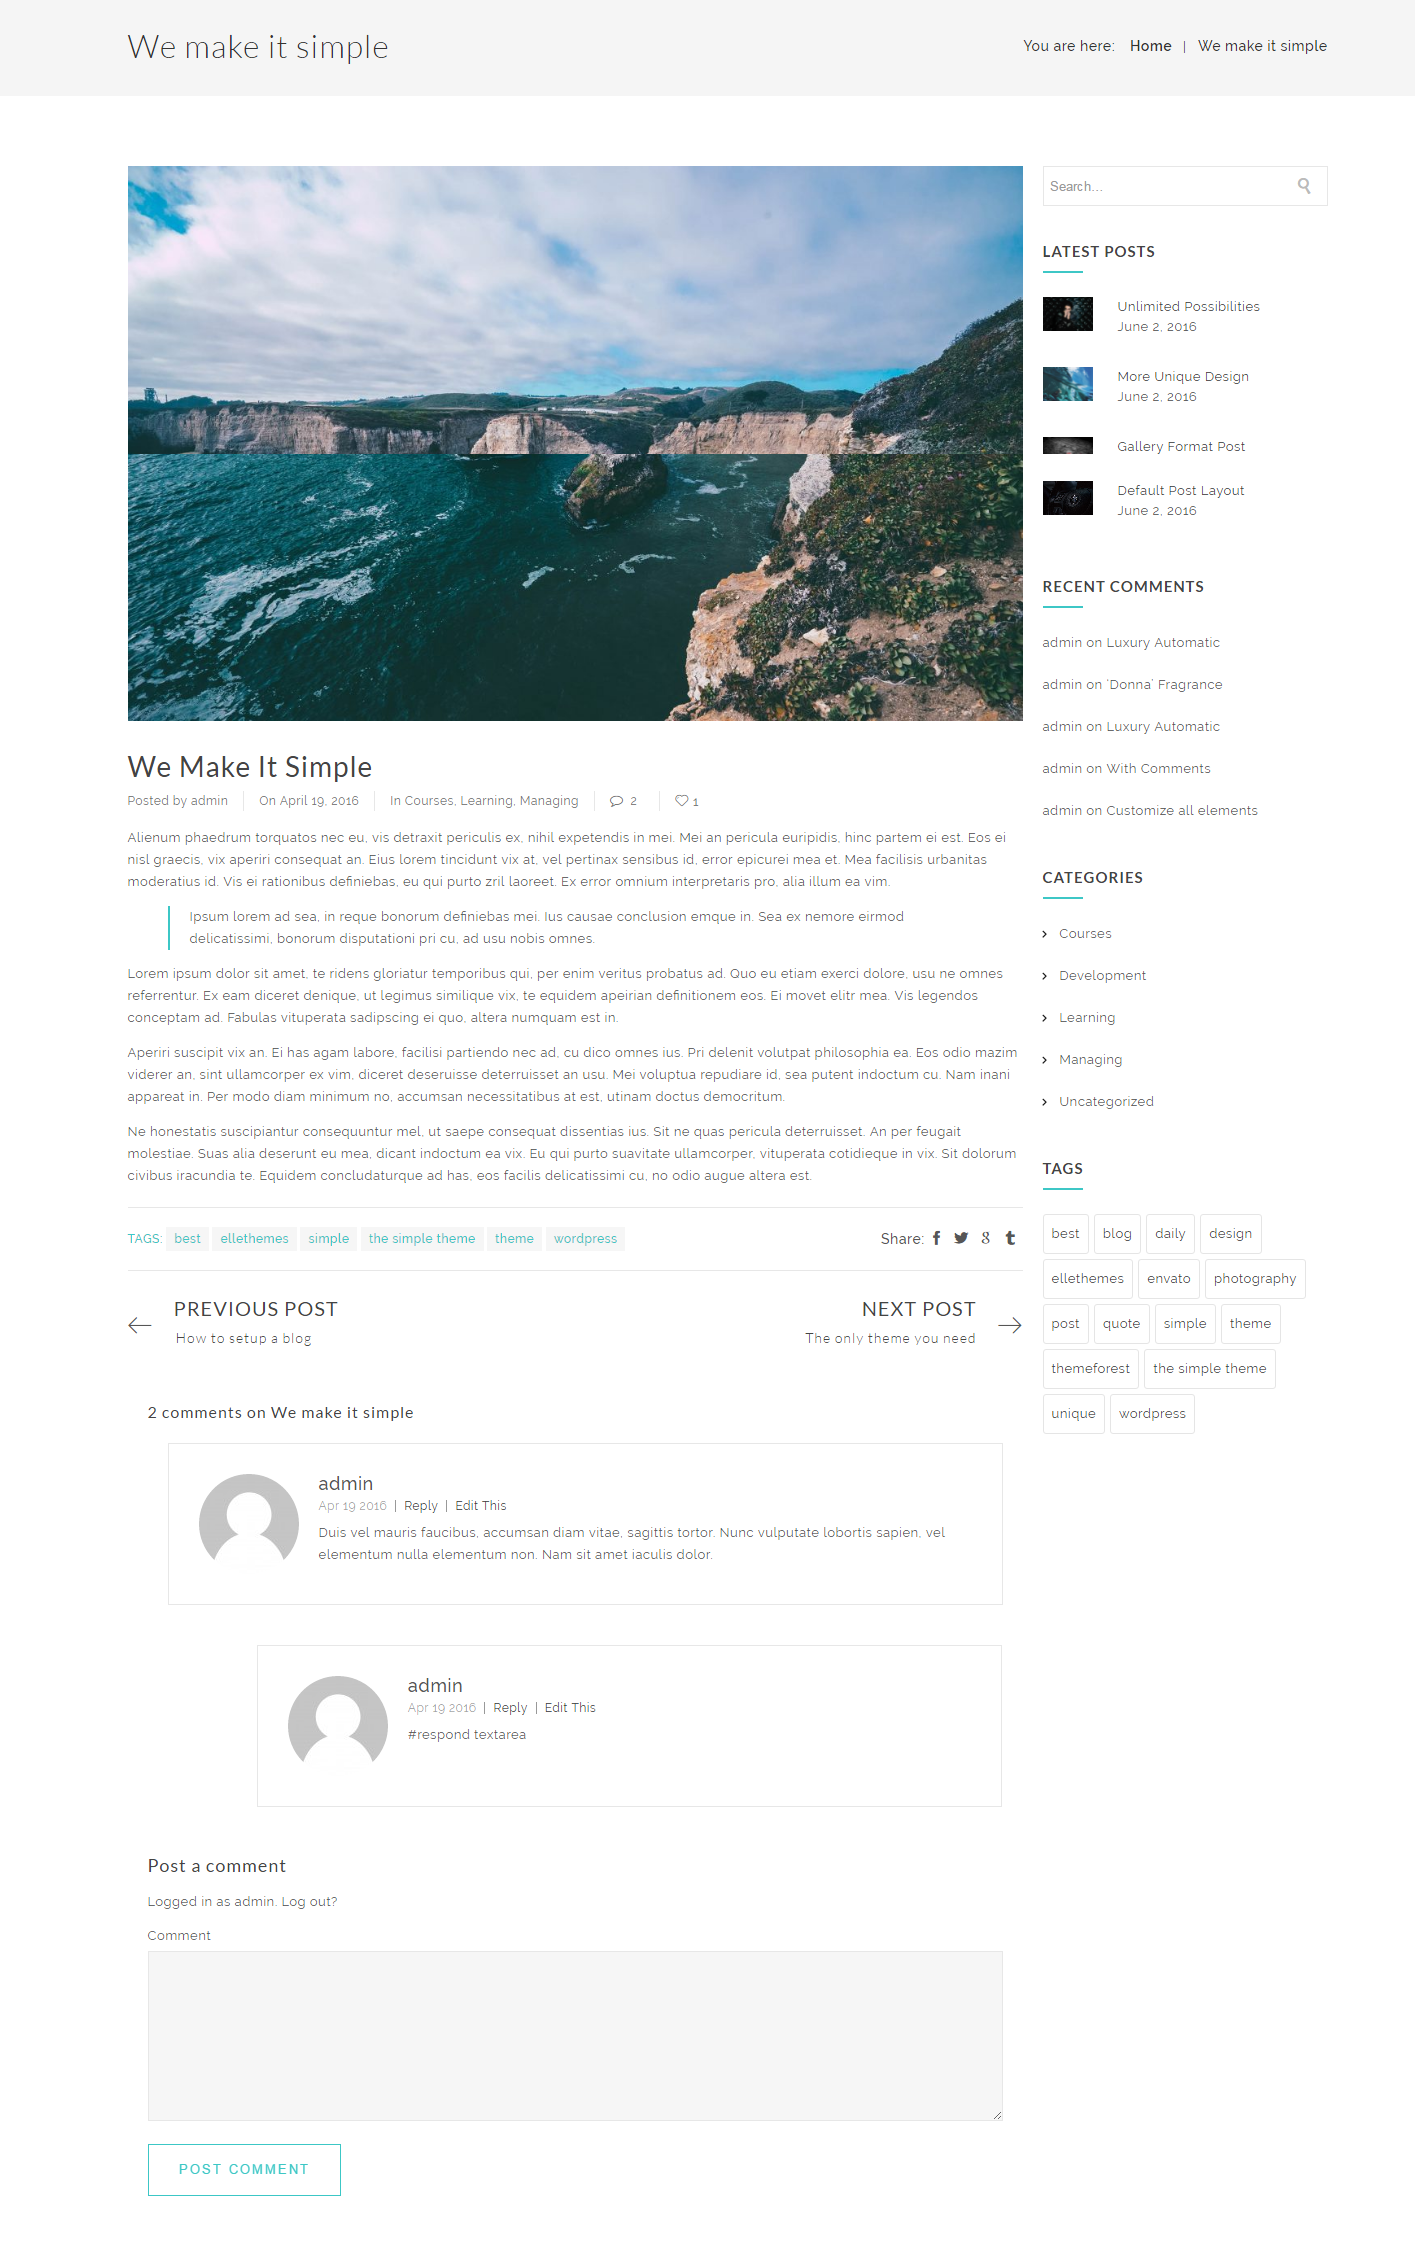
Blog Single Post Page Styles
Simple Post Style
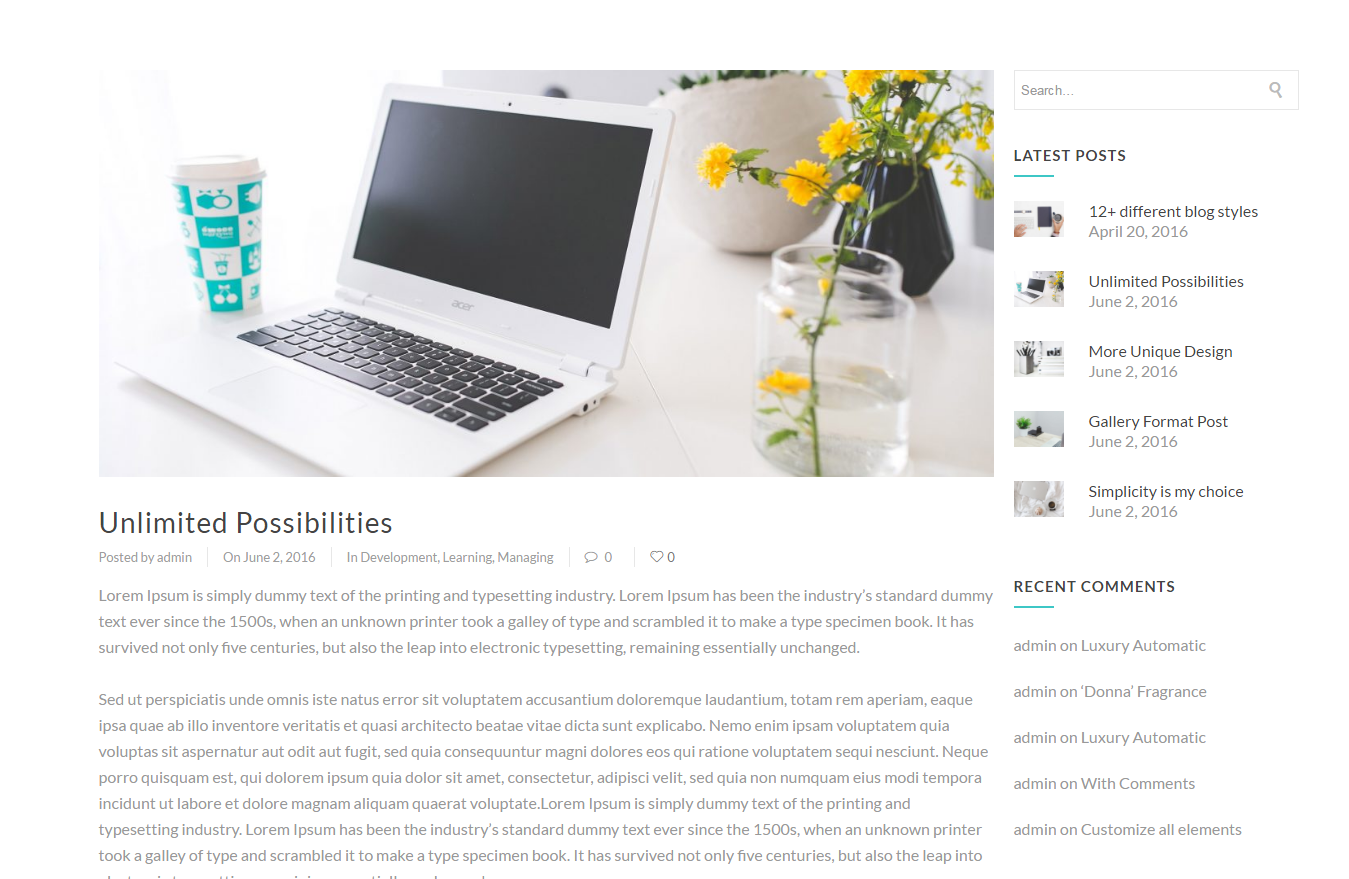
Fullscreen post
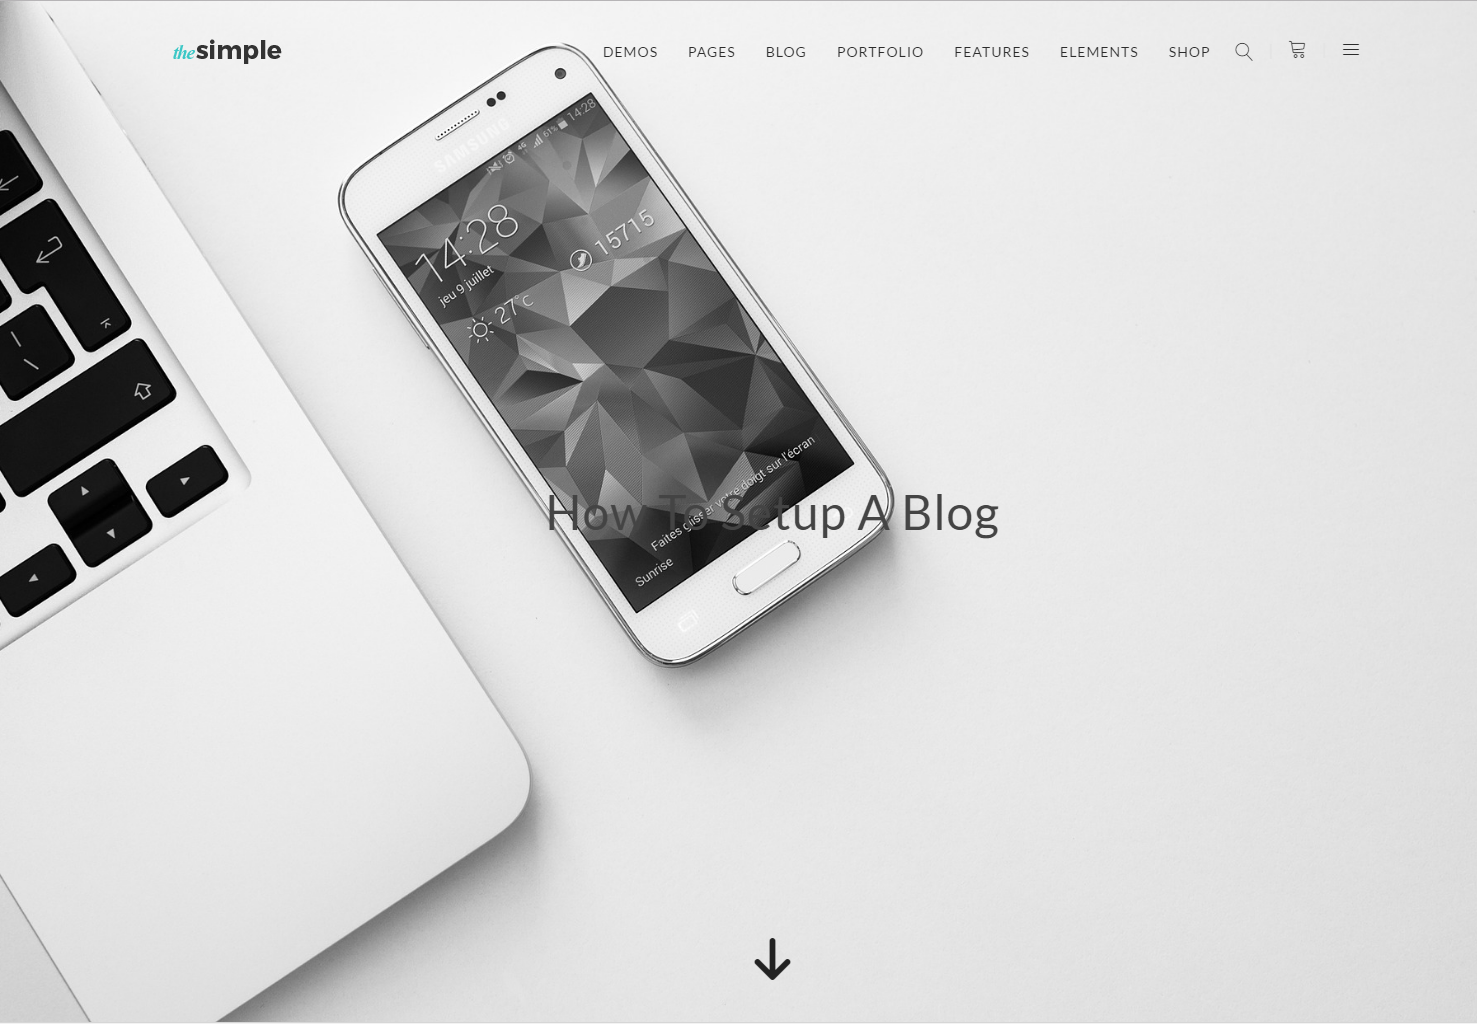
Portfolio styles
How to create a portfolio page
The Simple includes advanced portfolio options that allows users to create as many portfolio pages as they wish. Each portfolio page you create can have a different set of categories, options, layouts and more. Let’s get started!
Follow The Steps Below To Create A Portfolio Page:
- Step 1– Navigate to Pages and click Add New.
- Step 2– Input a new name for your page, then find the Page Attributes box on right side.
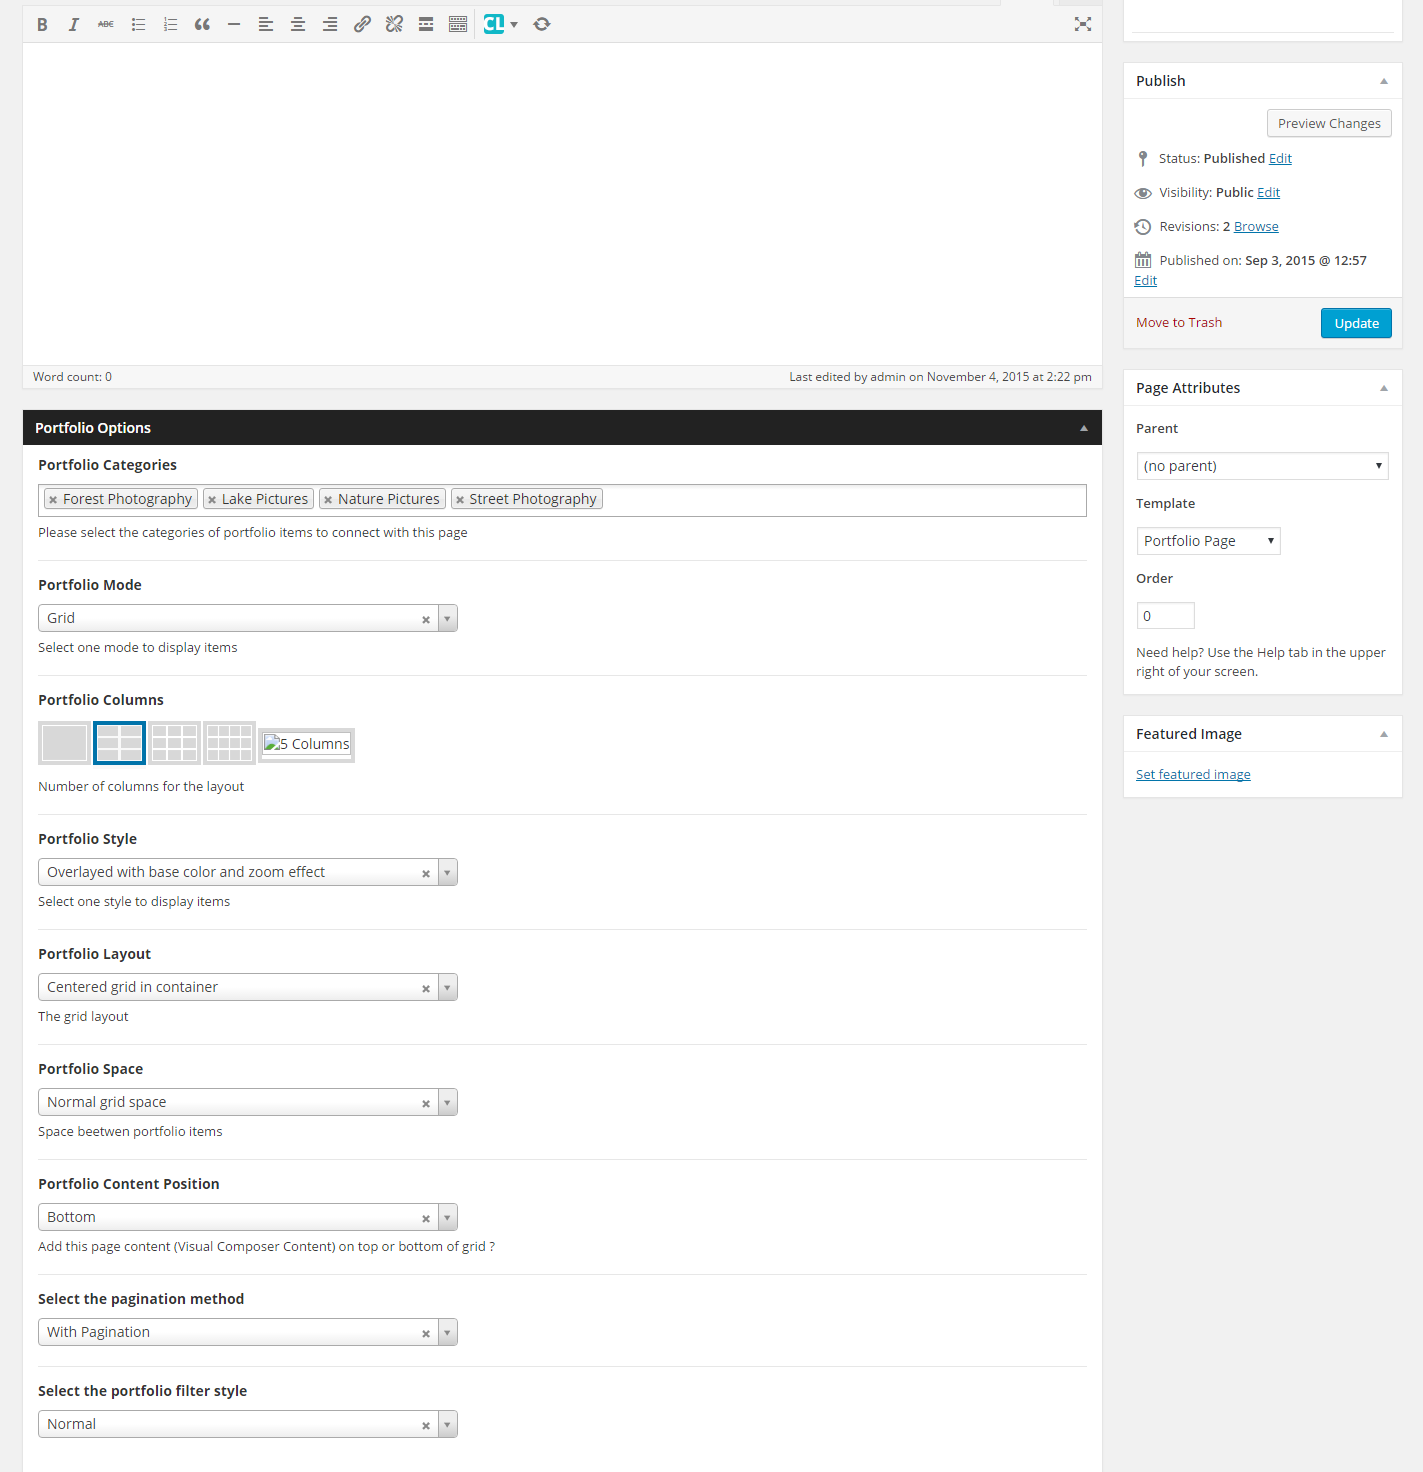
- Step 3– Select the Portfolio page template from the dropdown list, this will apply any portfolio post you create to the page. The following step shows how to specify a specific category per page.
- Step 4– Scroll down to find the Portfolio Options Box, where you can select which portfolio categories will show on this page. This option is what allows you to create multiple portfolio pages because each page can have a different set of posts assigned to it with the portfolio category option. Here you can customize your portfolio. Such as the categories to display, mode, style, Layout.. etc
- Step 5– Once you are done, be sure to Publish each page you create.
Portfolio video tutorial
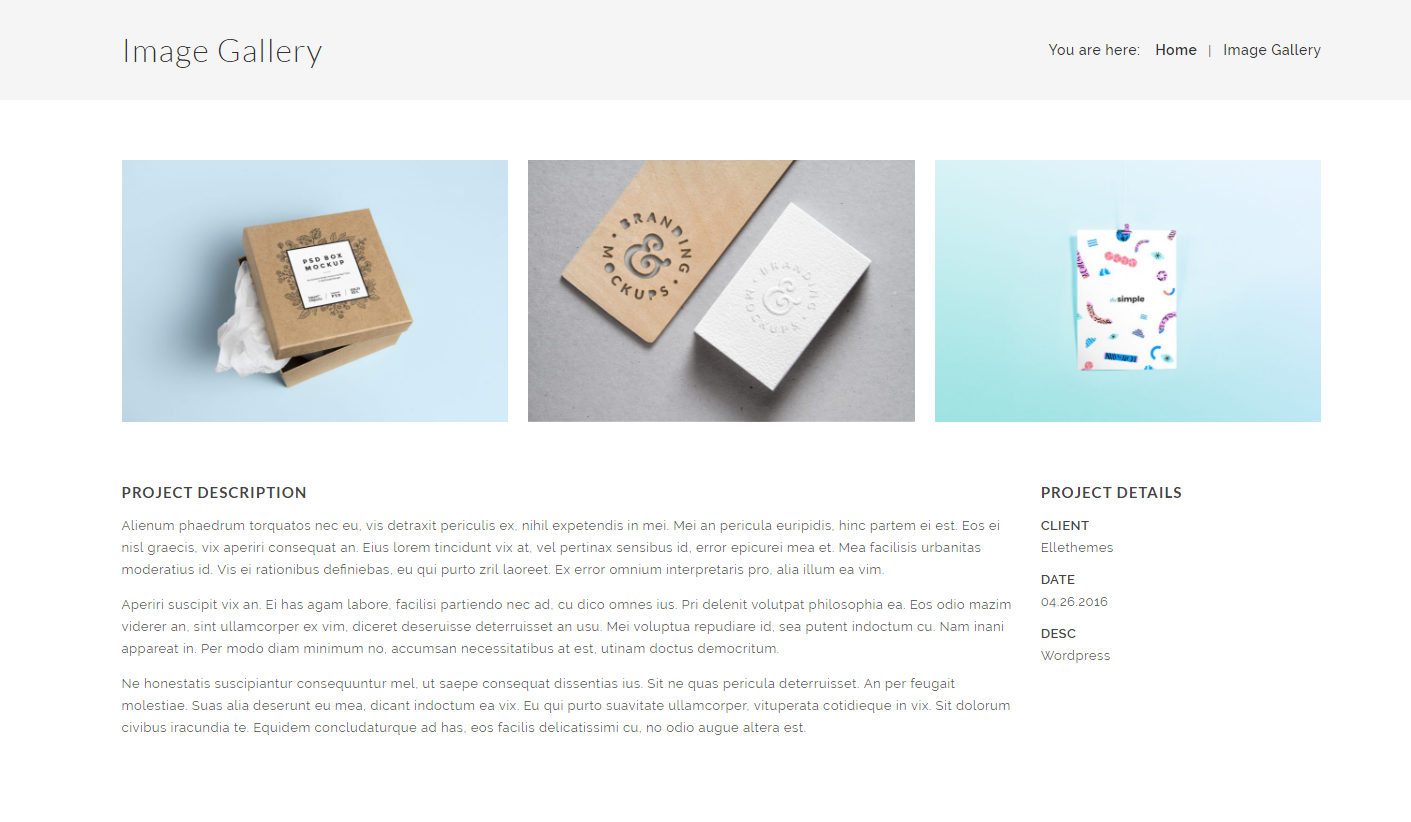
Single portfolio style
Create Portfolio Items
After you have made your portfolio page, you need to create portfolio posts so they will show up on the portfolio pages. The Simple offers several options for portfolio posts, and with the ability to assign custom categories to each post, you can easily display a set of posts based on category. Each portfolio post offers several ways to add tags, categories and skills. Categories are the filters you see above the post that allow the viewer to sort the posts. Skills and Tags are used to add additional meta info to the post. See below for information on how to create portfolio posts.
Follow the Steps Below To Create A Portfolio Post
- Step 1– Navigate to Portfolio Items in your WordPress admin.
- Step 2– Click on Add New to make a new post. Create a title and insert your post content in the editing field. You can use any of our short code builder elements inside the post.
- Step 3– Add Categories from the right side. To assign it to the post, check the box next to the Category name. These Categories are the filters that will sit above your portfolio images and allow you to filter the different types of projects.
- Step 4– For a single image, click the first Featured Image Box, select an image and click "Set Featured Image".
- Step 5– For a slideshow, go to Single Portfolio Options -> Add/Edit Slides. Here you can add images to slideshow. You can add as pictures as you like.
- Step 7– For a video post, go to Single Portfolio Options -> select Media type Video and insert the video from either Youtube or Vimeo, url or iframe at Video field.
- Step 9– Customize the Portfolio item from the Portfolio Options box.
- Step 10– Add portfolio meta fields.
- Step 11– Once you are finished, click Publish to save the post.
Featured Image on side
How to add project details?
Go to The Simple options -> Portfolio config and add some fields as in this screenshot:

At portfolio item, scroll to Single Portfolio Options and add the values as in this screenshot:

Set up Homepage
Setting up your home page is the same as setting up any other regular pages except that you need to specify in the settings which page will be your main home page. The Simple offers several pre-designed home page options. Any of the layout options you see on our demo can be imported through our demo content importer. However, you are not stuck with our pre-designed layouts, you can build any type of home page you desire using Visual Composer and the shortcode elements. You can mix and match anyway you like.
To Set Your Home Page, Follow These Steps
- Step 1– Navigate to The Simple > General Options.
- Step 2– Go to "Select Special Pages" area.
- Step 3– Choose the page you want as your home page from the dropdown list.
- Step 4– This is also the same spot you select the Blog page as the Post page.

Set up One Page
Go to Menu and set the link of the menu item which corresponds this section: #services
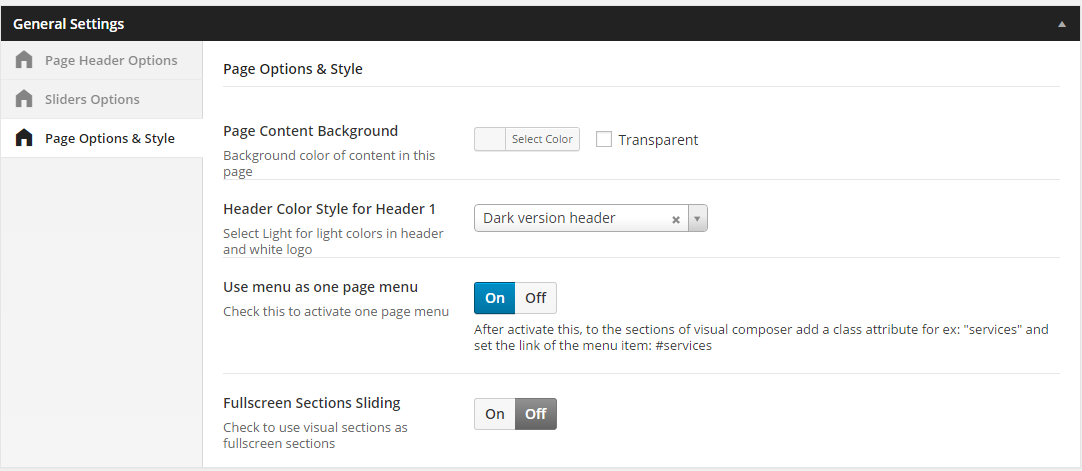
One Page video tutorial
Set up Contact Page
To setup the contact page, you will need to follow the same steps as for creating a normal page. Using Visual Composer elements , complete the contact page with a google map to show exact location and a contact form to make it easier for visitors to contact you.
Basic steps:
- 1- Create new page
- 2- From Visual Composer elements choose 'Google maps'
- 3- Edit the maps element with the right data and location url from google map
- 4- Make sure to have installed 'Contact Form 7' if not, install it.
- 5- Configure the default contact form with your email and save it (You can create as many different forms as you need)
- 6- In Visual Composer elements, choose ‘Contact form 7'. Select one of the created forms and add it to the page.

Set up FAQ's page
To setup the FAQs page, follow these steps:
- 1- Go to FAQ's menu in the main wordpress menu, select 'Create new item'
- 2- Create as many question-answers as you need.
- 3- Save each of them.
- 4- Create a new page and name it as you wish
- 5- Using Visual Composer, add 'FAQ' element to the page
- 6- Save everything

Set up Comming Soon page
To setup the waiting page, follow these steps:
- 1- Go to Pages > Add New, create page
- 2- Add the elements you want and the "Countdown" Visual Composer element
- 3- Publish page.
- 4- Go to The Simple general options
- 5- Scroll to special pages section
- 6- Select your page in the "Select Coming Soon Page"

Set up 404 page
To setup the 404 page, follow these steps:
- 1- Go to The Simple general options
- 2- Scroll to special pages section.
- 3- Add some text at 404 page editor
- 4- Add the image background

6. Sliders
Creating Simple Slider
The Simple slider is a very nice and powerful slider. You can create lot of different sliders, each different from one another. To create and populate a slider follow these steps:
- 1- Create the slider in Simple Sliders > Add New Slider
- 2- Fill in the fields with the required info.
- 3- Save
- 4- Now is time to create the slides, that will populate the slider.
- 5- On 'Simple slider' go to Add New Slide
- 6- Set the Name of the new slide.
- 7- Configure the slide options in 'The Simple Slide Option' box below.
- 8- In the right menu, check the slider that will contain this slide (it can be assign to more than one slider)
- 9- Publish
Simple slider option - Background

Simple slider option - Content
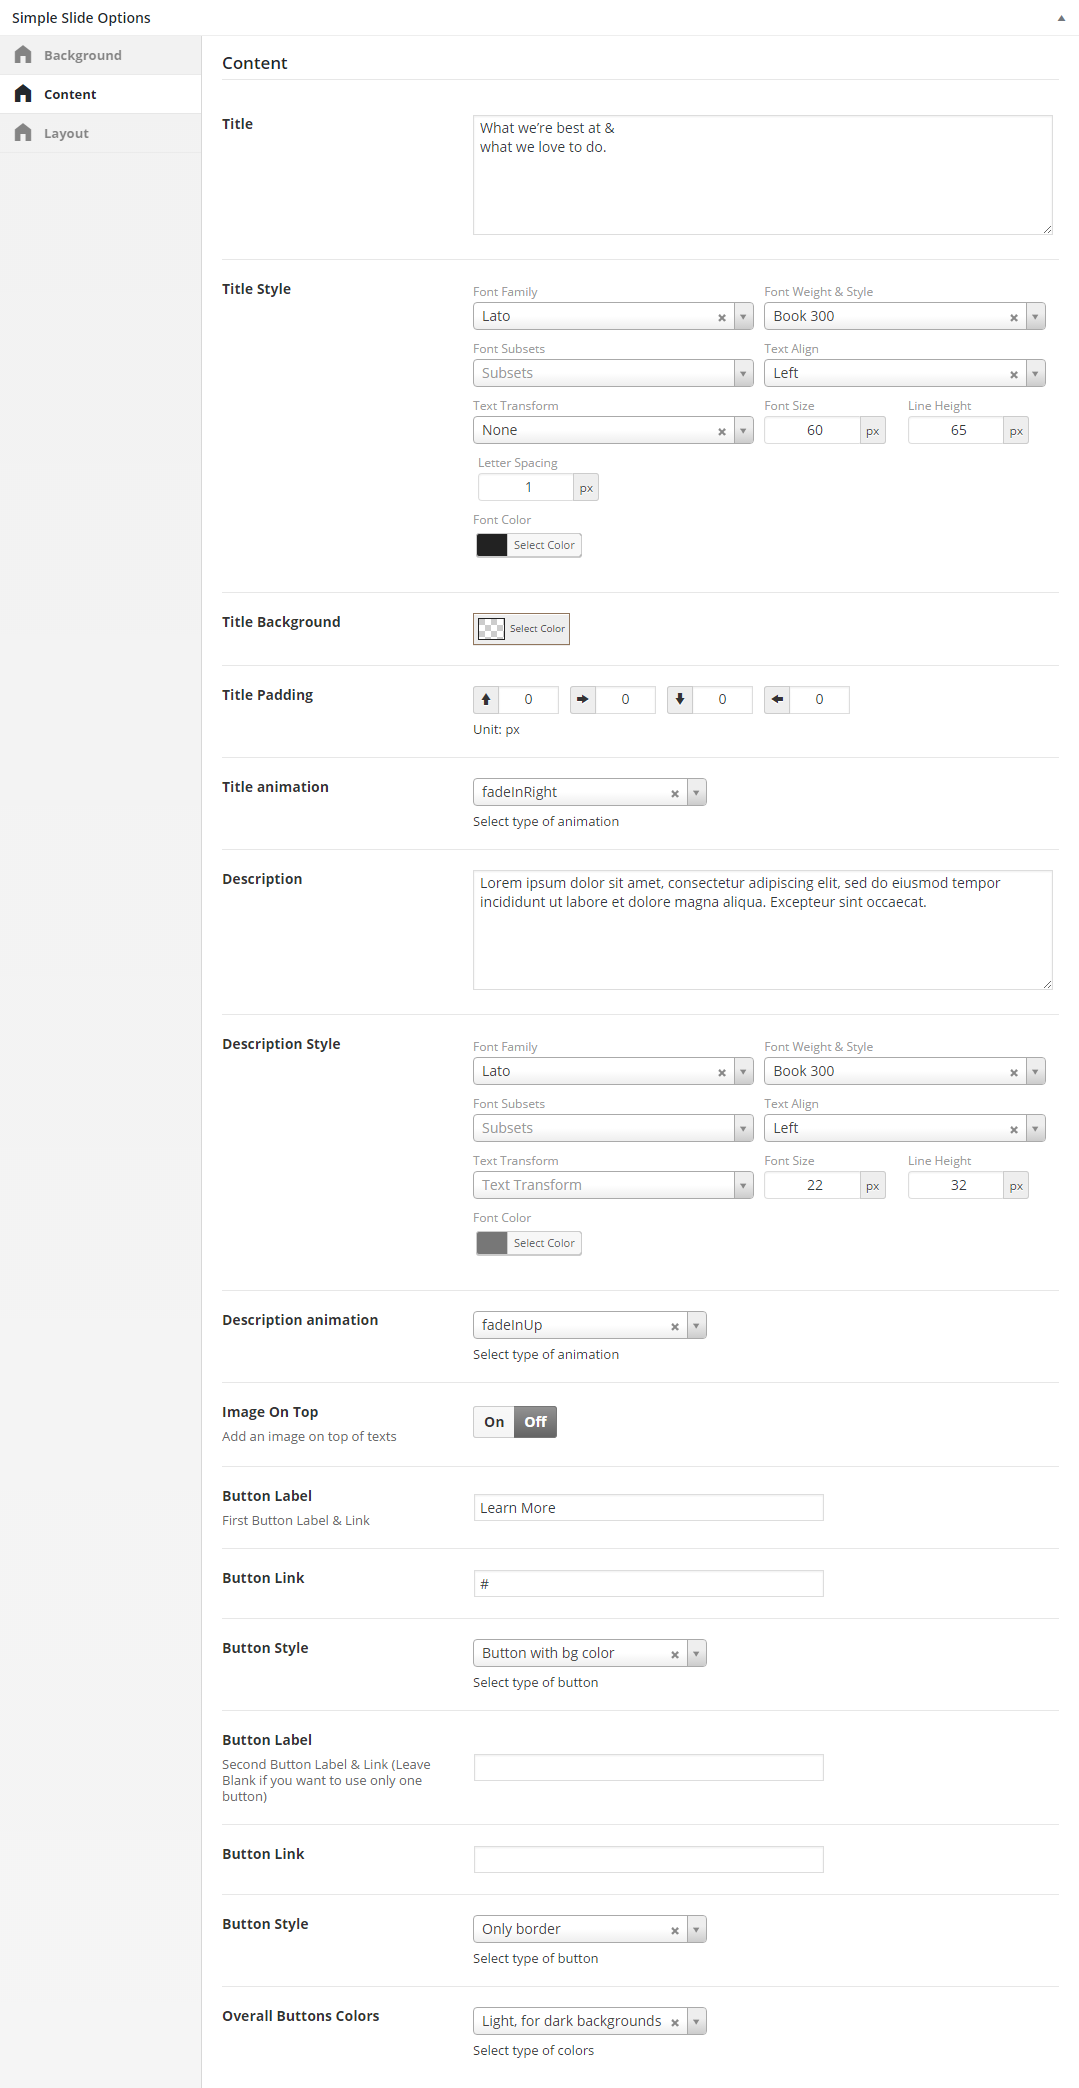
Simple slider option - Layout

To user a slider, you have to first select the page that will contain it. Than select and configure the desired slider.
How to Assign Slider
To assign slider to a page, go to the 'General Settings' > 'Slider Options' and choose one of the available sliders from the dropdown list.
Create Image Background Slider

Create Video Slider

Revolution Slider
Create a Revolution Slider
Revolution Slider, is composed by sliders and slider template.
You can choose to either import Slider with dummy data, or create it from scratch. To create from the start, follow the steps below:
- Create new slider

Save the settings, then edit Slides. Add some slides then save.
The slider can be added in a page by assigning it at page options section as in the image:

Or it can be added in a page, on each section of the page by using Visual Composer, select Revolution Slider element.
After creating the slider, you can edit, export or delete it. There can be changes even to the template, after it's been created.
Import Slider dummy data
You can choose to use the sliders used in our theme demos and then edit them. The slider dummy data are included in theme package, you can find them in the folder "slider_dummy_data". Follow the steps:
- 1. Go to Revolution slider and click Import Slider.
- 2. Select the slider dummy data zip file.

- 3. Click Import.
8. Plugins
Visual Composer
Visual composer is a strong and important feature of The Simple theme. It contains all necessary elements to build numerous unique and complete pages. You can add, edit, delete, arrange elements to your liking and need. We'll go through a full and detailed explanation of each one of them. See below a list of all available elements:
This plugin is include in theme are you can use it. But you can't update the plugin separatly from the theme. The license code of the plugin isn't include din theme. We continuously launch theme updates and include the latest versions of the plugins in theme. If you see a notification for a new version of the plugin, please check if there is also a new theme update. If not, then wait until it's available.
If you wnat to update the plugin each time a new version is available and don't want to wait for a them update you can purchase the plugin in CodeCanyon.
Visaul Composer original documentation
WooCommerce
- WooCommerce Plugin Page – This is the official WooCommerce plugin page
- WooCommerce Documentation – This is the WooCommerce Online documenation created by WooThemes
- WooComerce Commiunity Forums – This is the community forum for WooCommerce plugin created by WooThemes
WPML
- WPML Forum Support - If you bought WPML then you get free support from their team
- WPML Documentation - This is created by the WPML developerss
MailChimp
Contact Form 7
A contact form can be added anywhere in the page using visual Compsoer -> ContactForm 7 element.
Envato Wordpress Toolkit
Go to Envato wordpress toolkit and add your marketplace username and the api key. Follow the instructions on screen to find the api key.

At themes tab will appear the envato items you have purcahsed. Find our theme there are click 'update theme' is there is an update available.


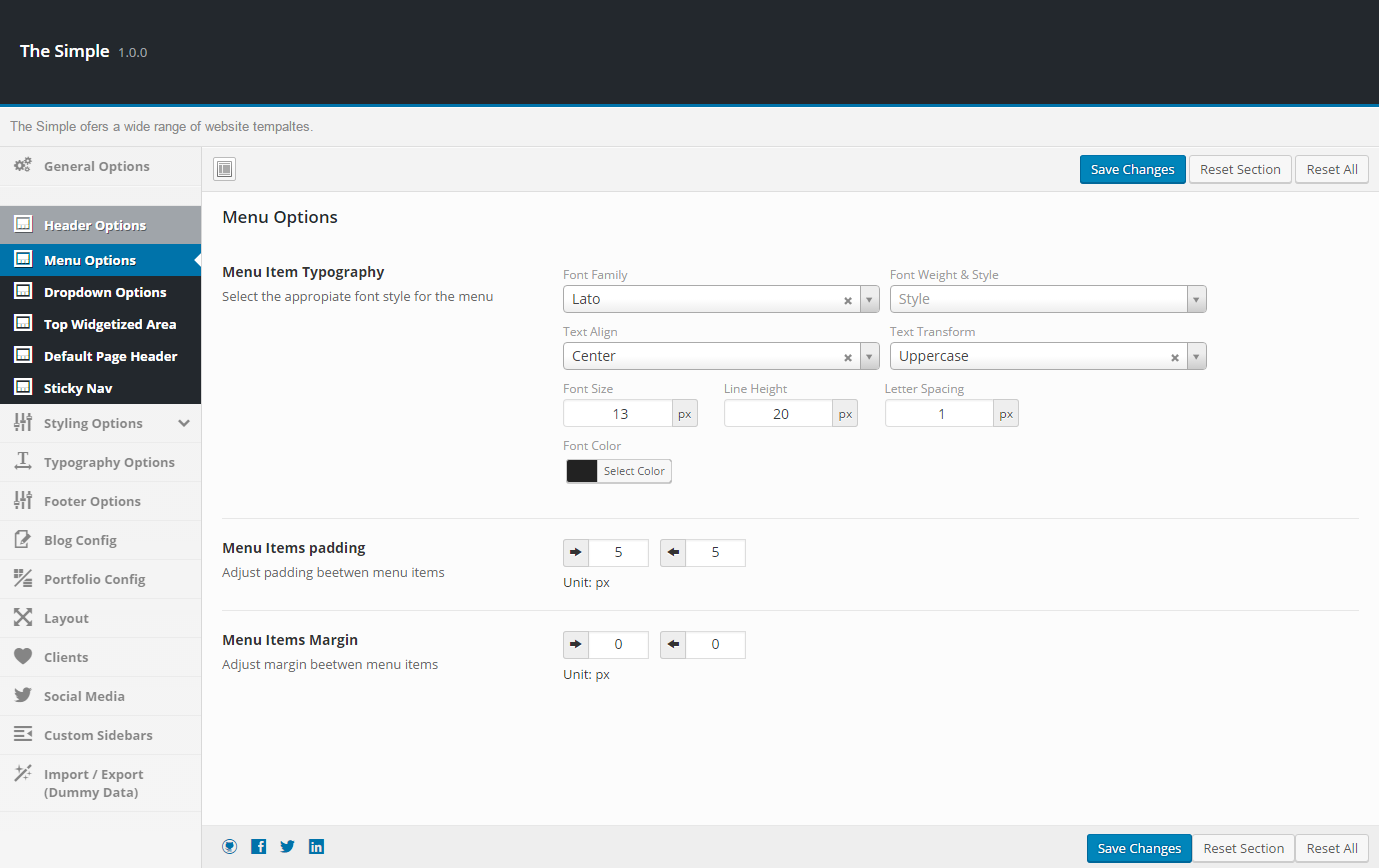
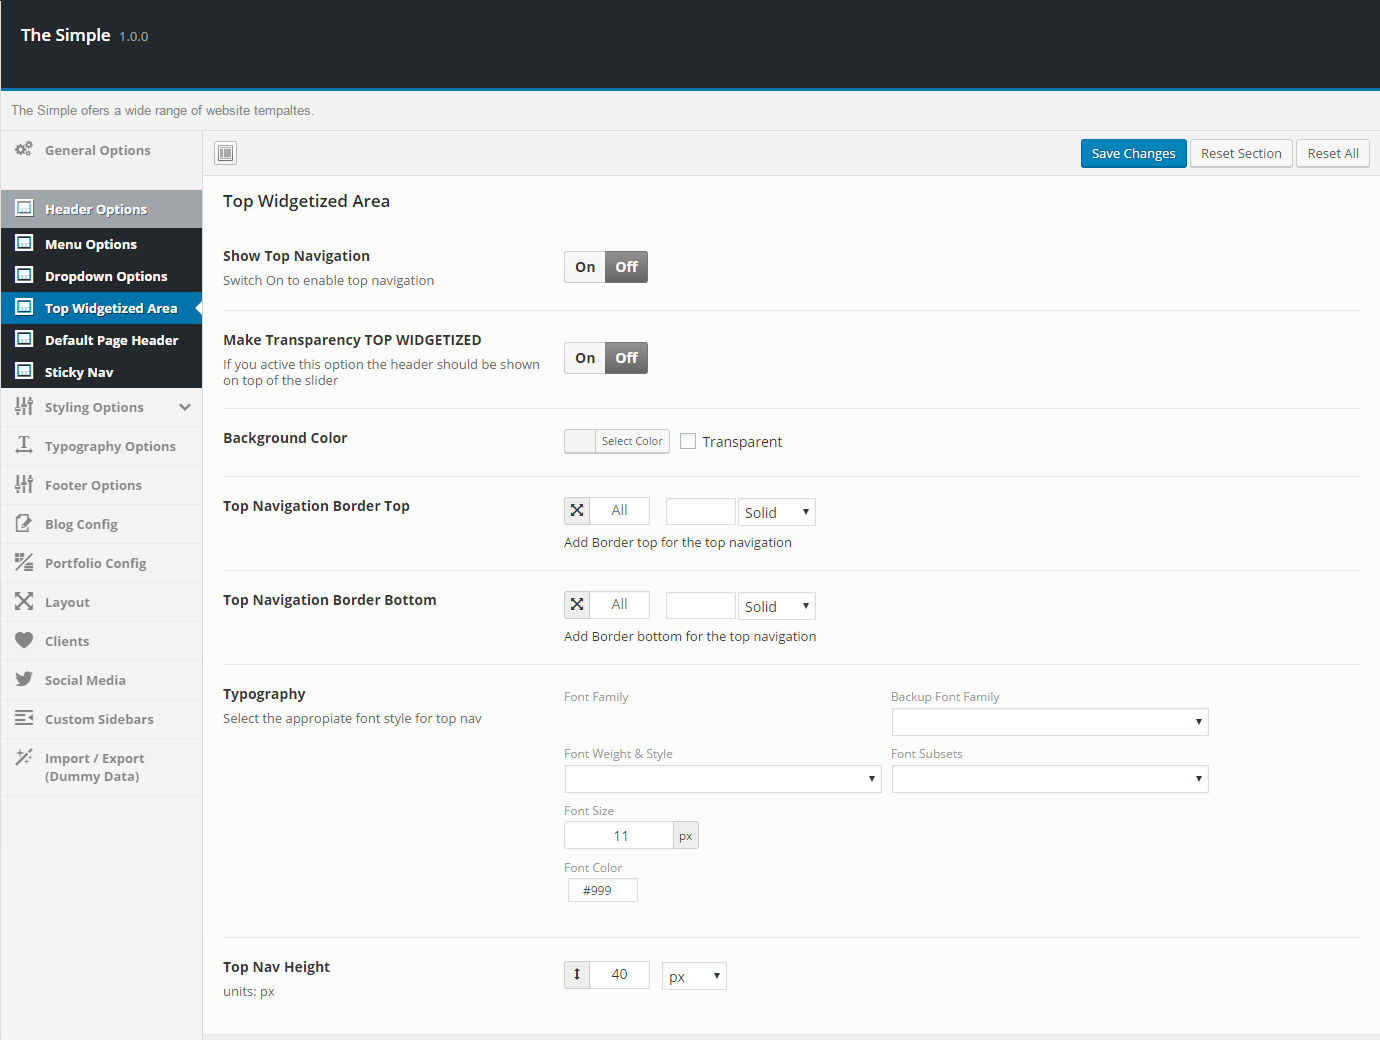




Social Media
Add and/or edit the social media links and icons here.